


Impact Pro Stainless Steel Frypan, 24cm/ 2.25L


Impact Pro Luxe Deep Kadai with Glass Lid, 24 cm/ 3.25L


Trismart Triply Casserole with lid, 20cm
IMPACT-FORGED BOTTOM


Shop Our Cookware Set

Vendor: Grillpan

Vendor: Tawa

Vendor: Kadai


Our Story
Backed with 30+ years of expertise in stainless steel industry, from the founders of Suncity Metals and Tubes, we present SUNCASA- premium 304 stainless steel brand, redefining healthy cooking!
At Suncasa, we believe that home is more than just four walls- it’s a feeling. From best quality materials to aesthetic designs, we create pans, pots, and kitchen tools that don’t just cook, they belong.
Recipes, with Love ❤️
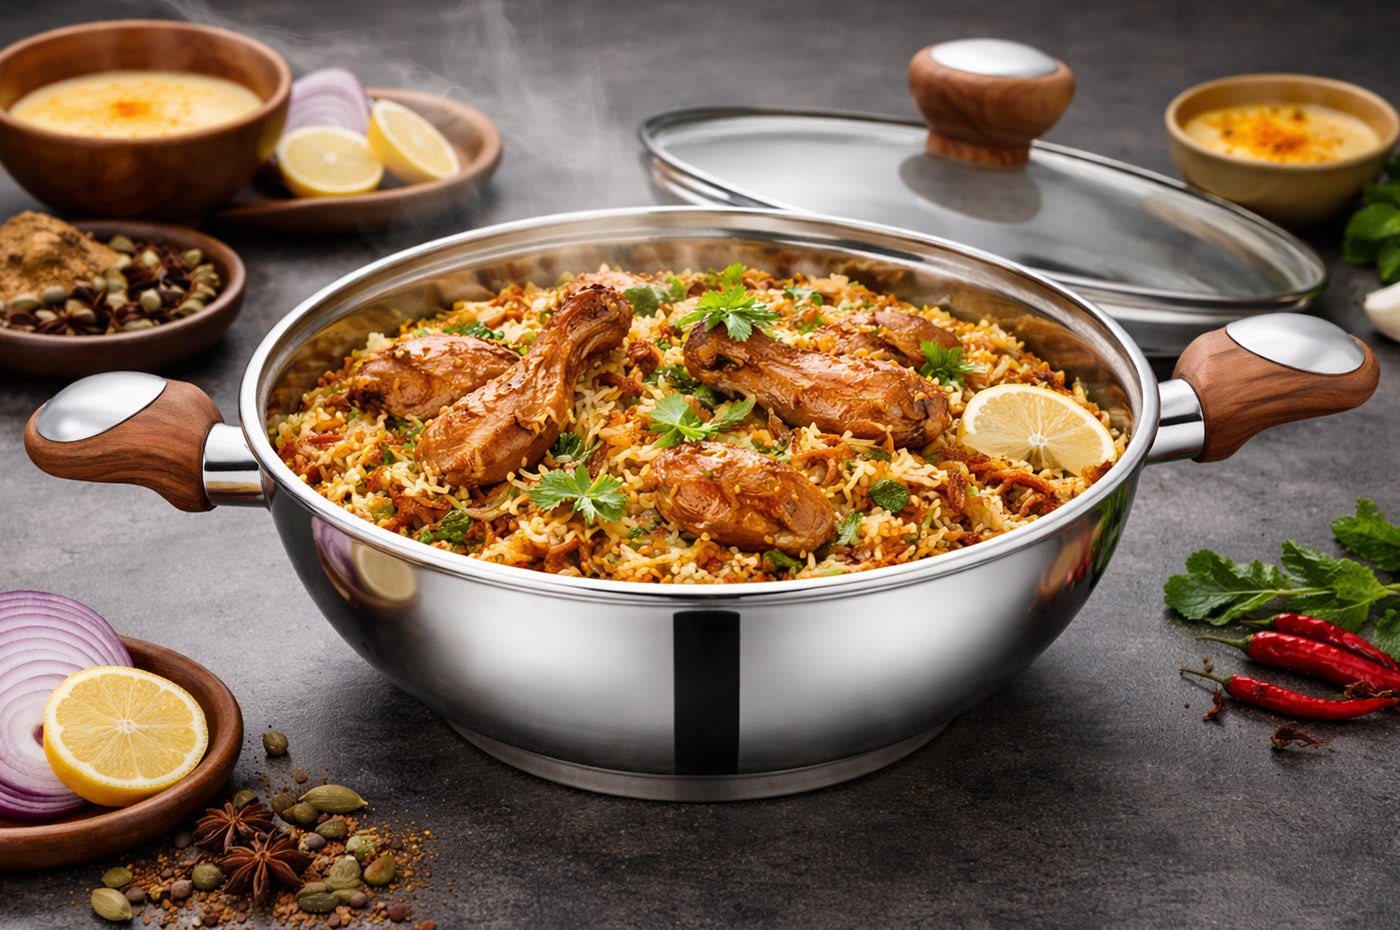
Biryani at Home: Step-by-Step Guide for Dum Biryani in a Deep kadai
People don't get as thrilled about Indian food as they do about aromatic dum biryani. The kitchen smells straight immediately of basmati rice, spices, saffron, and slow-cooked masala. The recipe is important, but so is the cookware you use.
A deep kadai that heats evenly helps the biryani cook slowly and evenly. A lot of home cooks pick the SunCasa Deep Kadai because it is manufactured of high-quality 304-grade stainless steel. This cookware is composed of steel that is safe to use with food, so it will last a long time. It works great for traditional Indian cooking methods like dum cooking.
Why You Should Use a Deep Kadai to Make Biryani
A deep kadai has ample area to stack rice and masala, which is necessary for producing true dum biryani.
The SunCasa deep kadai is made of high-quality 304 stainless steel and has the following:
Slow cooking with heat that spreads evenly
Strong and long-lasting stainless-steel cookware
304 steel that is safe to use in the kitchen
Deep structure is useful for making biryani and curries.
It is easy to use because it has strong grips.
This is what makes it one of the best pots and pans for Indian cooking.
How to Make Easy Dum Biryani at Home
Step 1: Cook the rice
Boil basmati rice with whole spices until it is around 70% done. Then, drain it and put it aside.
Step 2: Make the Masala
Put some ghee or oil in the SunCasa deep kadai and heat it up.
Fry the onions until they turn brown. Add the ginger-garlic paste, tomatoes, biryani masala, turmeric, and chilli powder, and let the mixture boil for a while.
Step 3: Add the key sections.
Add some chicken or vegetables, yoghurt, mint, and coriander leaves. Cook till the masala smells delicious and is thick.
Step 4: Layer the Biryani
Put a layer of rice on top of the masala. Add herbs, saffron milk, and fried onions to the mix. Do the layers again.
Step 5: Making the dumplings
Cover the kadai and cook it on low heat for 20 to 25 minutes. This lengthy dumb process blends the rice, spices, and masala just so.
The SunCasa Deep Kadai is the best because
The SunCasa deep kadai is made of high-quality 304-grade stainless steel and will endure a long time. It cooks food evenly and is perfect for producing authentic Indian cuisine. It is strong and has a deep structure, so you may use it to make biryani, curries, and other Indian foods every day.
Final Thoughts
Making dum biryani at home is simple if you have the right recipe and adequate pots and pans. A SunCasa deep kadai made of food-grade 304 stainless steel will ensure that your food cooks evenly, tastes good, and lasts a long time in your kitchen.
If you have the right pans and ingredients, making restaurant-style biryani at home is easier than you may think.
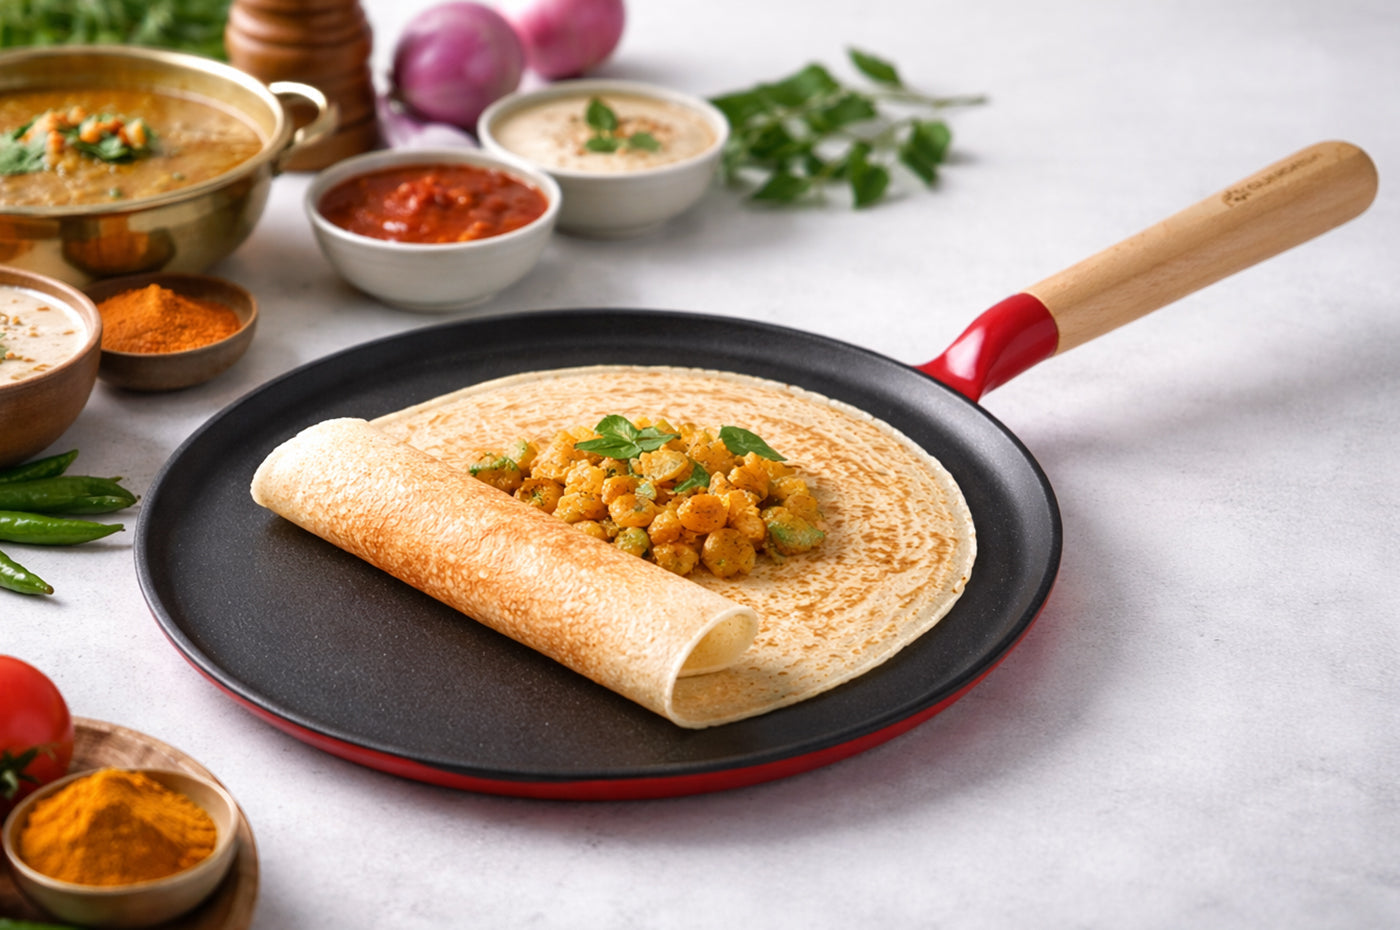
South Indian Staple Recipes Using SunCasa Cookware
One kitchen offers authentic tastes, timeless recipes, and the perfect tools to cook them.
People in India love South Indian food because it tastes good, is good for you, and makes you feel better. Indian families have served crispy dosas, fluffy idlis, and aromatic sambhar for generations.
But a lot of people don't see this.
The pots and pans you use might change the taste of South Indian meals.
To cook the old-fashioned way, you need good pots and pans, uniform heat distribution, and materials that endure a long time. SunCasa cookware truly shines in this area. SunCasa's pots and pans are made of cast iron and 304-grade stainless steel, which is exceptionally sturdy. It makes cooking easy and helps you taste the true flavour, whether you're creating a crispy dosa or spicing up sambhar.
Let's look at some traditional South Indian foods and see how the SunCasa Dosa Tawa and other SunCasa cookware help you make them the same way every time.
Why It's Important to Use the Right Cookware When Making South Indian Food
Most of the time, South Indian recipes demand for robust cookware that can bear a lot of heat and has flat cooking surfaces.
Using high-quality cookware made of 304-grade stainless steel and cast-iron guarantees:
The heat spreads out evenly.
Strength that lasts for a long time
Safe to cook on
It truly works to cook the old-fashioned way.
SunCasa cookware works well in both modern and traditional Indian kitchens, so you may use it to make South Indian cuisine every day.
1. The masala dosa is a crispy South Indian meal that many people like:
Every South Indian dinner should include the famed masala dosa.
A nice dosa tawa is the key to making a superb dosa. The surface must heat up uniformly so that the batter can spread out and fry into a thin, crispy coating.
The SunCasa Dosa Tawa is made of high-quality cast iron, which is the greatest material for cooking. Cast iron maintains heat effectively, so you can cook crispy dosas at home just as they do in restaurants.
What you need
Mix for dosa, potatoes that have been cooked, seeds of mustard, leaves of curry, turmeric, green chillies, oil or ghee.
How SunCasa Can Help
SunCasa's cast iron dosa tawa makes sure that
The heat spread out evenly.
It feels like it has a crunch. The taste of South India
When the dosa is well-seasoned, it comes off the tawa easily and has the right amount of golden crispness.
2. In South Indian dinners, sambhar is the primary dish:
Lentils, vegetables, and spices are all used in sambhar, which is a healthy food. It has vada, dosa, idli, and rice.
To prepare sambhar, you need to keep it boiling and at a consistent temperature. The easiest way to do this is to use high-quality cookware made of 304-grade stainless steel.
SunCasa cookware made of 304 stainless steel that is safe for food comes with these guarantees:
Making food safely
A surface that doesn't react with tamarind or spices
Strength that lasts a long time
Sambhar tastes rich and calming since it has a strong structure and spreads heat evenly.
3. Uttapam: soft, thick, and tasty:
People generally say that uttapam is a dosa that is thicker and softer, with onions, tomatoes, and green chillies on top.
For uttapam, you need pans that can hold heat without scorching the batter.
The SunCasa cast-iron dosa tawa works great again. The batter cooks slowly since the foundation is hefty and the heat stays the same. This is the perfect way to caramelise the toppings.
What happened?
The inside is soft and the borders are a little crispy, much like in traditional South Indian kitchens.
4. Coconut chutney is the best side dish:
Coconut chutney is a must-have side dish for dosa, idli, and uttapam.
Even though it's easy to make, the tempering (tadka) is very vital for bringing out the taste of the chutney.
Using SunCasa high-quality stainless-steel cookware constructed from 304-grade steel makes sure that the following are true:
The oil gets hot all around.
Mustard seeds pop just so.
The smell of curry leaves comes out.
The food-grade stainless steel surface doesn't react with the things, so the tastes stay pure.
5. Rasam: The Best Soup to Make You Feel Better
Rasam is a soup from South India that is light and sour. Tamarind, spices, and tomatoes are used to make it. It's easy to make and tastes great.
When making rasam, it's vital to cook it slowly.
SunCasa's high-end 304 stainless steel cookware creates the ideal cooking environment for spices to blossom slowly and flavours to mix perfectly.
The end result is an authentic rasam that smells and tastes exactly right.
Why SunCasa Cookware is the Best for Cooking in South India
You need cookware that can endure high heat, regular usage, and traditional cooking methods if you want to make South Indian food.
SunCasa cookware is different because it employs both new technology and old materials.
SunCasa makes their cookware with stainless steel of grade 304, stainless steel that is safe for food, and old-fashioned cast iron pots and pans.
These materials make sure that cooking is safe, lasts a long time, and tastes real.
A strong and sturdy design
All SunCasa cookware is made with:
Strong building, durability that lasts a long time, and can handle a lot of heat.
This makes it great for preparing Indian food every day. Great for making traditional Indian food.
SunCasa cookware makes traditional cooking easy by letting you make dosa, uttapam, sambhar, and rasam.
Why You Need the SunCasa Dosa Tawa
The SunCasa cast iron dosa tawa rapidly becomes a kitchen favourite if you like South Indian food.
It gives:
Keeps heat perfectly, dosa with a crispy texture. Experience cooking with cast iron the old-fashioned way, and durability that lasts a long time.
The tawa gets a natural nonstick seasoning over time, which makes each dosa taste better than the previous.
Last Thoughts
It's not only about the recipes when it comes to South Indian food. It's all about the appropriate cookware, skill, and tradition.
Using real ingredients and high-quality SunCasa equipment makes cooking easier and the flavours stronger.
In the end, recipes don't always make amazing meals.
SunCasa makes cooking in your own kitchen fun by giving you the necessary cookware and ingredients.
Kada Prasad | Simple and Quick
Warm, comforting, and deeply spiritual, Kada Prasad is a sacred offering prepared with devotion and simplicity. Cooked in our Impact Pro Luxe cookware, every spoonful stays pure, wholesome, and authentic.
Ingredients (Serves 4–5)
-
Water – 2.5 cups
-
Sugar – 1 cup
-
Kesar (saffron) – 12 to 15 strands
-
Ghee – 1 cup
-
Wheat flour (atta) – 1 cup
-
Mixed dry fruits (cashews, almonds, pistachios), chopped – 1/2 cup
How to make it:
-
Place the Suncasa Impact Pro Luxe Casserole on low flame and add water, sugar, and saffron.
-
Stir until the sugar dissolves completely and let the syrup come to a gentle boil. Keep aside.
-
Heat the Suncasa Impact Pro Luxe Sauté Pan on low flame and add a little ghee.
-
Add chopped cashews, almonds, pistachios, and roast until evenly golden. Remove and set aside.
-
Place the Suncasa Impact Pro Luxe Flat-Bottom Kadai on low heat and add ghee.
-
Add wheat flour and roast slowly, stirring continuously until aromatic and golden brown.
-
Gradually pour the hot sugar syrup into the roasted atta, stirring gently to avoid lumps.
-
Continue mixing until the kada prasad turns smooth, glossy, and thick.
-
Add the roasted dry fruits and mix evenly.
-
Transfer into the Hammered Casserole, garnish, and serve warm.
When cooked with the right techniques and pure ingredients, it carries the same warmth and sanctity as the prasad served in Gurudwaras.
Moong Dal Dosa and Cheesy Bombs | Castella Cast Iron
We all have those days where we crave something comforting and traditional, like a crispy dosa. But then we might also want something indulgent like a cheese-filled snack. What if one healthy batter could give you the best of both worlds?
Let’s dive into how you can master these two distinct dishes using one simple batter and the power of SUNCASA Castella.
Ingredients:
Moong Dal Batter
- Moong Dal (Yellow Split Gram): 1 cup (Note: It will double to about 2 cups after soaking)
- Cumin Seeds: 1 tsp
- Green Chillies: 2 (adjust for spice preference)
- Garlic: 6 cloves
- Ginger: ½ inch piece
- Water: ½ cup (adjust to get a smooth, pouring consistency)
- Salt: To taste
Cheesy Bombs (Appe)
- Cheese: Small mozzarella cubes
- Oil: For greasing the appe pan
Crispy Dosa
- Cooking Fat: Coconut oil or ghee
- Toppings: Gunpowder (Podi) masala
- Filling: Aloo masala (spiced potato filling)
- Side: Coconut chutney
How to make:
Preparing the Batter
1. Soak: Wash the moong dal thoroughly and soak it in water overnight, or for at least 3 hours. We used the FESTA Insulated casserole for this. This softens the lentils and makes them easier to digest.
2. Blend: Drain the water. Add the soaked dal to a blender along with the cumin seeds, green chillies, garlic, and ginger.
3. Grind: Add about ½ cup of water and grind everything into a smooth, fine batter. The consistency should be similar to a pancake batter, not too runny, not too thick. Add salt to taste and mix well.
Cheesy Moong Dal Bombs
1. Heat the Pan: Place your SUNCASA Cast Iron Castella Appe Pan on medium heat. Add a few drops of oil into each hollow cavity.
2. Pour Base Layer: Once the pan is hot, pour a spoonful of batter into each cavity, filling it only halfway.
3. Add the Surprise: Place a small cube of mozzarella cheese into the center of the wet batter in each cavity.
4. Cover: Pour a little more batter on top to cover the cheese completely.
5. Cook and Flip: Let them cook for 2-3 minutes until the bottom is golden brown. Using a skewer or a small spoon, gently flip each bomb over.
6. Finish: Cook for another 2 minutes until the other side is golden and the cheese inside has melted. Serve hot for that satisfying cheese pull!
Crispy Moong Dal Dosa
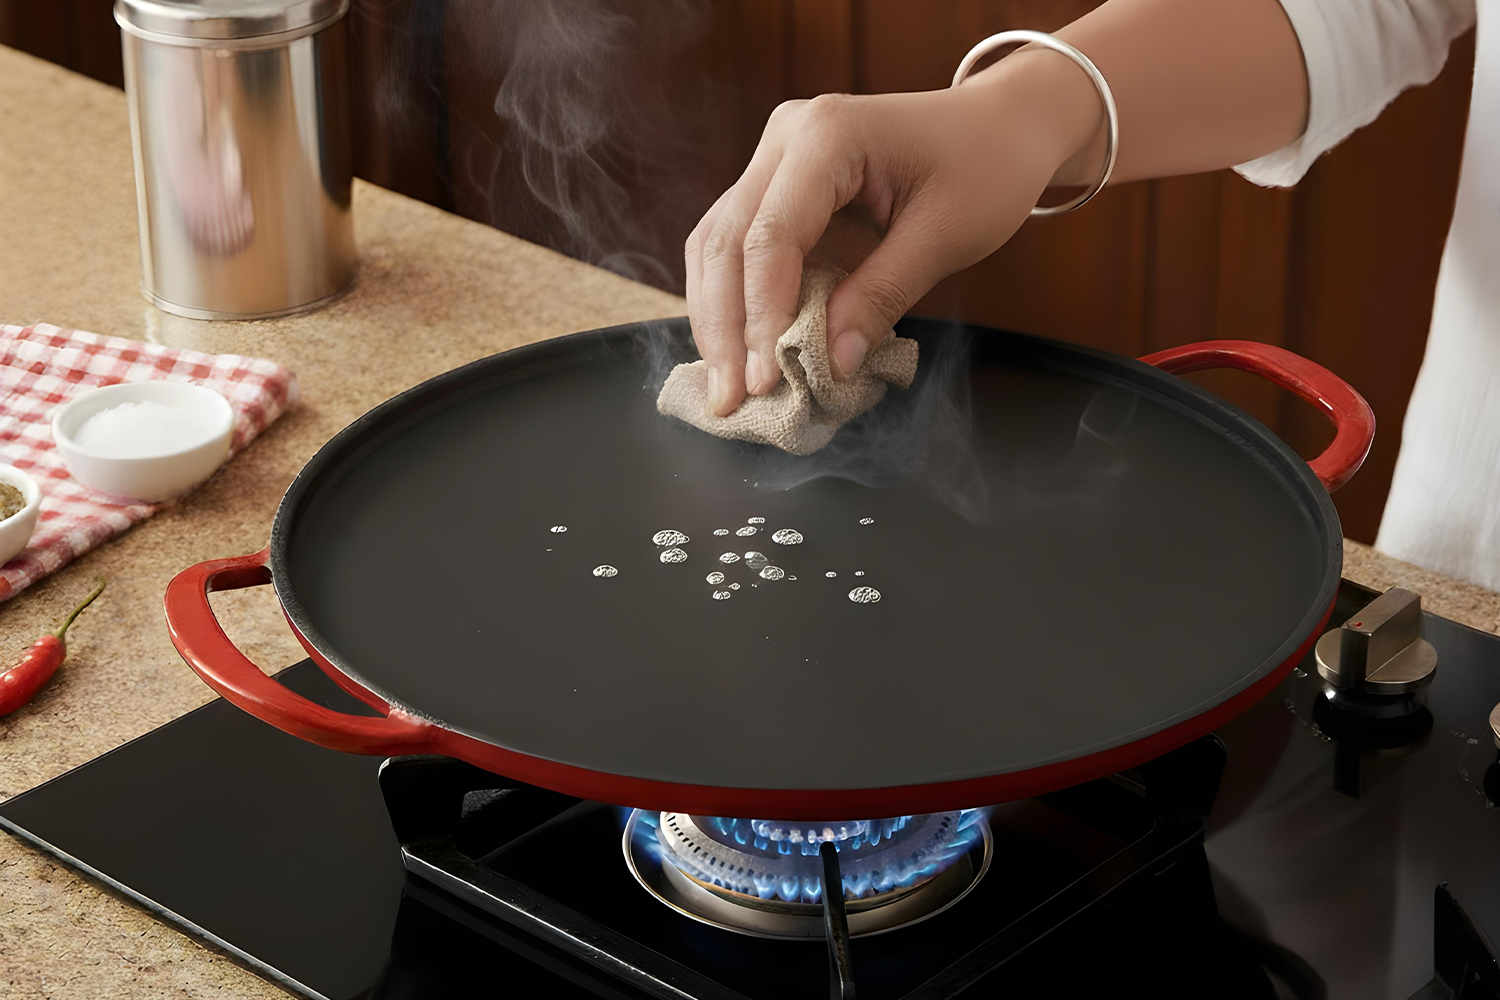
1. Prep the Tawa: Heat your cast iron dosa tawa on medium-high heat. Drizzle a little oil and wipe it with a tissue or a cut onion to season the surface.
2. Spread: Pour a ladleful of the batter into the center of the tawa. Using the back of the ladle, spread the batter in a circular motion, moving outward to form a thin, large circle.
3. Season: Drizzle a teaspoon of ghee or coconut oil around the edges and on top of the dosa.
4. Add Flavor: Sprinkle a generous amount of Podi (gunpowder masala) over the dosa. Place a scoop of aloo masala in the center.
5. Crisp Up: Let it cook until the base turns golden brown and crispy. You’ll see the edges starting to lift off the tawa naturally.
6. Fold and Serve: Fold the dosa over the filling and remove from heat. Serve immediately with fresh coconut chutney.
Unlike chemically coated non-stick pans that wear out, cast iron gets better with age. It enriches your food with iron, holds heat longer to save fuel, and provides a natural non-stick surface that makes flipping dosas and appe effortless. By investing in high-quality pieces like the Castella Dosa Tawa and Appe Pan, you aren't just buying cookware; you're upgrading your lifestyle to be healthier and more sustainable.
Jalebi Rabdi Recipe: A Crispy, Creamy Indian Dessert You Can Make at Home
Few Indian desserts can match the irresistible charm of hot jalebis paired with rich, creamy rabdi. This timeless combination brings together crisp sweetness and luxurious texture in every bite. Whether you're celebrating a festival, hosting guests, or simply satisfying a sweet craving, this Jalebi Rabdi recipe is the perfect choice. With simple ingredients and the right cookware, making authentic jalebi with rabdi at home is easier than you think. Let’s dive into this delicious recipe step by step.
Why Jalebi Rabdi Is So Loved
Jalebi and rabdi are individually iconic Indian sweets, but together they create a truly unforgettable dessert experience. Freshly fried jalebis, soaked in a saffron-infused sugar syrup, offer the perfect crunch, while chilled rabdi adds richness and depth.
The contrast between warm, crispy jalebi and creamy rabdi makes this dessert a favourite during festivals such as Diwali, Holi, Eid, and weddings. The best part is that with a reliable cookware range like SUNCASA, you can recreate this restaurant-style dessert right in your own kitchen.
Ingredients for Jalebi
Before starting this homemade jalebi, gather all the ingredients.
For the Jalebi Batter
- 1 cup all-purpose flour (maida)
- 1 tbsp ghee
- 1 tsp fruit salt (Eno)
- Water as required
These are the essential ingredients for jalebi that help create a smooth and airy batter.
For Sugar Syrup (Chasni)
- 1 cup sugar
- 2.5 cups water
- 12–15 saffron strands
- ½ tsp cardamom powder
For Rabdi
- 2 cups full-fat milk
- ½ cup milk powder
- ¼ cup sugar (adjust to taste)
- ½ cup chopped almonds and pistachios
- A few saffron strands for garnish
For Frying
- Ghee or oil as required
Step-by-Step Jalebi Rabdi Recipe
Step 1: Prepare the Sugar Syrup
A perfect jalebi depends heavily on a well-balanced sugar syrup.
Take the stainless steel saucepan and place it over medium heat. Add sugar, water, saffron strands, and cardamom powder.
Stir continuously until the sugar dissolves completely. Allow the mixture to boil until it reaches a light one-string consistency. To test, place a drop between your thumb and forefinger. When pulled apart, a thin thread should form.
Once ready, switch off the flame and keep the syrup warm. Warm syrup allows the jalebis to absorb sweetness evenly while maintaining their crisp texture.
Step 2: Make the Jalebi Batter Recipe
The secret to a great jalebi batter recipe lies in achieving the right consistency.
In a mixing bowl, combine flour, ghee, and fruit salt. Slowly add water while whisking continuously. The batter should be smooth, lump-free, and thick enough to hold its shape while being easy to pipe.
Transfer the prepared batter into a piping bag or squeeze bottle with a narrow nozzle. This will help create the signature spiral shape of jalebis. A properly prepared batter ensures that your jalebi recipe turns out crispy on the outside and light on the inside.
Step 3: Fry the Jalebis
Heat ghee or oil in a deep kadai over medium-high heat. To check if the oil is ready, drop a small amount of batter into it. If it rises immediately with bubbles, the temperature is perfect. Carefully pipe the batter directly into the hot oil in circular spirals. Try to maintain even spacing for uniform cooking.
Then fry until the jalebis turn golden and crisp on both sides. Avoid overcrowding the pan, as this can lower the oil temperature and affect crispness. Once fried, remove the jalebis using a slotted spoon and immediately transfer them to the warm sugar syrup.
Allow them to soak for about one minute so they absorb the syrup while remaining crunchy. Remove and place them on a serving plate.
Step 4: Prepare Rich and Creamy Rabdi
No jalebi with rabdi is complete without a thick and flavourful rabdi.
Using the sauté pan, pour in the milk and add milk powder. Stir thoroughly to avoid lumps.
Place over medium heat and bring the milk to a gentle boil. Add sugar and continue stirring frequently. Allow the mixture to reduce slowly for approximately 15–20 minutes. As the milk thickens, it develops a rich, creamy texture that defines authentic rabdi.
The heavy-duty stainless steel construction of the SUNCASA sauté pan ensures even heat distribution, preventing scorching while helping the milk reduce consistently. Once the rabdi reaches your desired consistency, remove it from the heat and allow it to cool slightly.
Why the Right Cookware Matters
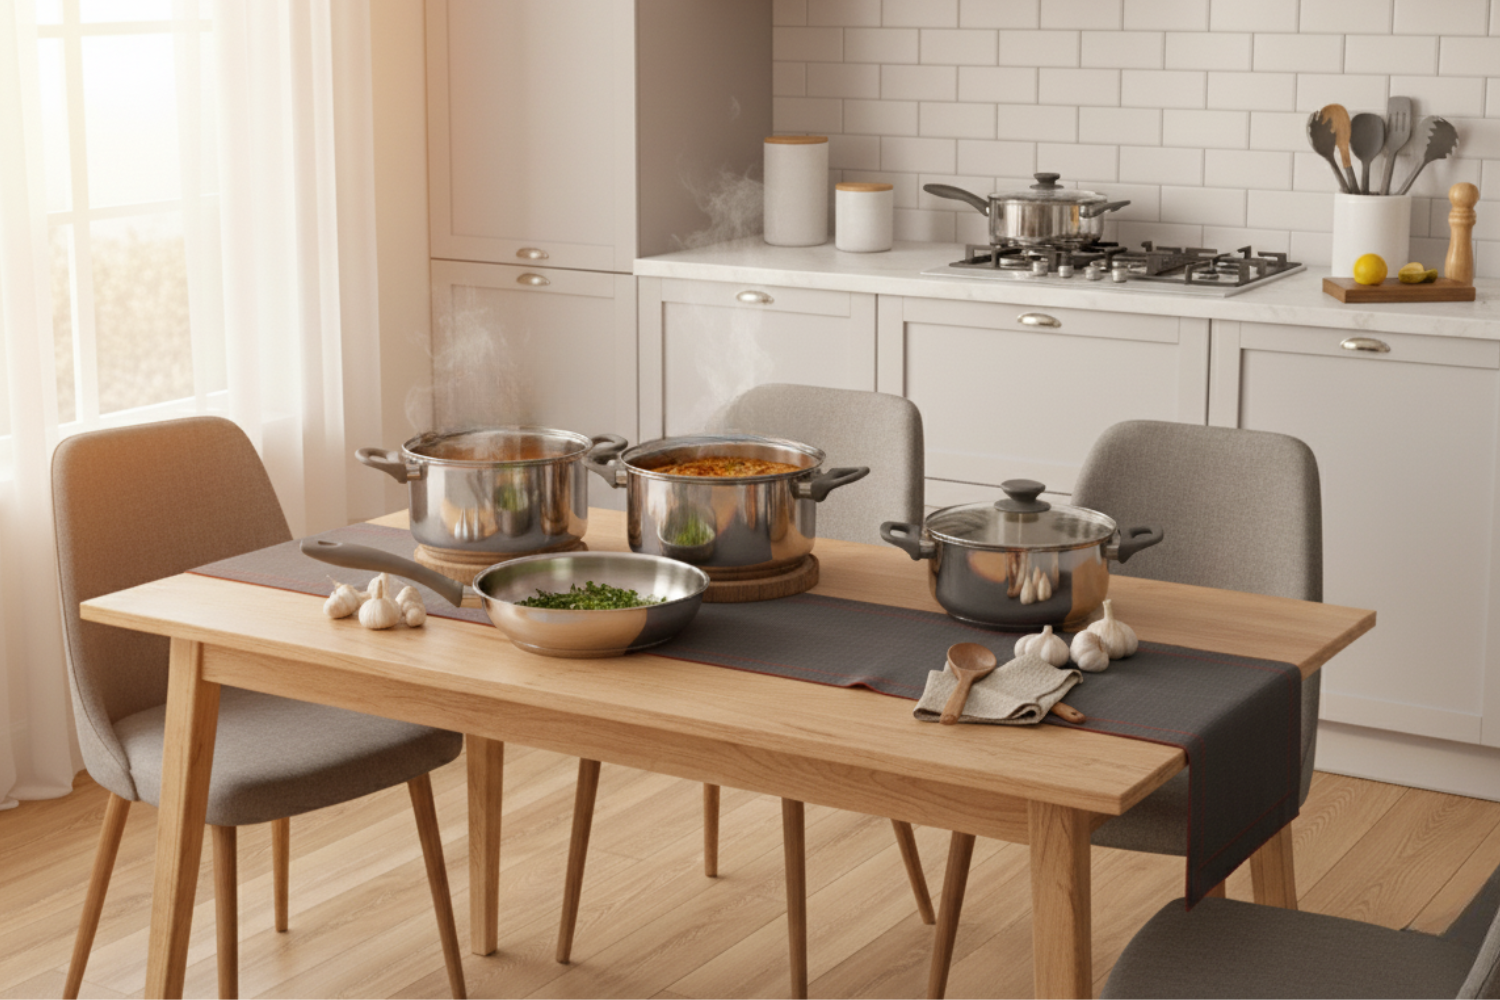
Traditional Indian desserts require precision and consistent heat control. The SUNCASA Impact Pro Luxe Saucepan is designed using premium food-grade stainless steel and features:
- Even heat distribution
- Impact-forged heavy bottom
- Stay-cool handles
- Easy cleaning and maintenance
- Compatibility with gas, induction, ceramic, and oven cooking
These features make it ideal not only for preparing sugar syrup and rabdi but also for everyday cooking tasks.
When making desserts like homemade jalebi, consistent heating plays a crucial role in achieving perfect textures and flavours.
Plating and Serving
Now comes the most enjoyable part. Arrange the syrup-soaked jalebis on a serving plate. Generously pour warm or chilled rabdi over them. Garnish with chopped almonds, pistachios, and saffron strands.
The result is a stunning dessert featuring crispy jalebis layered with creamy rabdi, creating a beautiful balance of texture and flavour. Serve immediately for the best experience.
Tips for Perfect Homemade Jalebi
|
Tip |
Why It Matters |
|
Keep the syrup warm |
Helps jalebis absorb sweetness evenly |
|
Maintain medium-high oil temperature |
Ensures crisp texture |
|
Use a smooth batter |
Creates uniform spiral shapes |
|
Avoid over-soaking |
Preserves crunch |
|
Reduce rabdi slowly |
Develops richer flavour and texture |
Following these simple tips can elevate your jalebi recipe from good to exceptional.
Final Thoughts
This classic Jalebi Rabdi Recipe proves that creating festive Indian desserts at home does not have to be complicated. With the right ingredients for jalebi, a well-prepared jalebi batter, and dependable cookware like the SUNCASA Impact Pro Luxe Saucepan, you can enjoy authentic jalebi with rabdi whenever you like. Bring home the joy of traditional Indian sweets and explore the complete SUNCASA cookware collection to make every recipe easier, more enjoyable, and truly memorable.
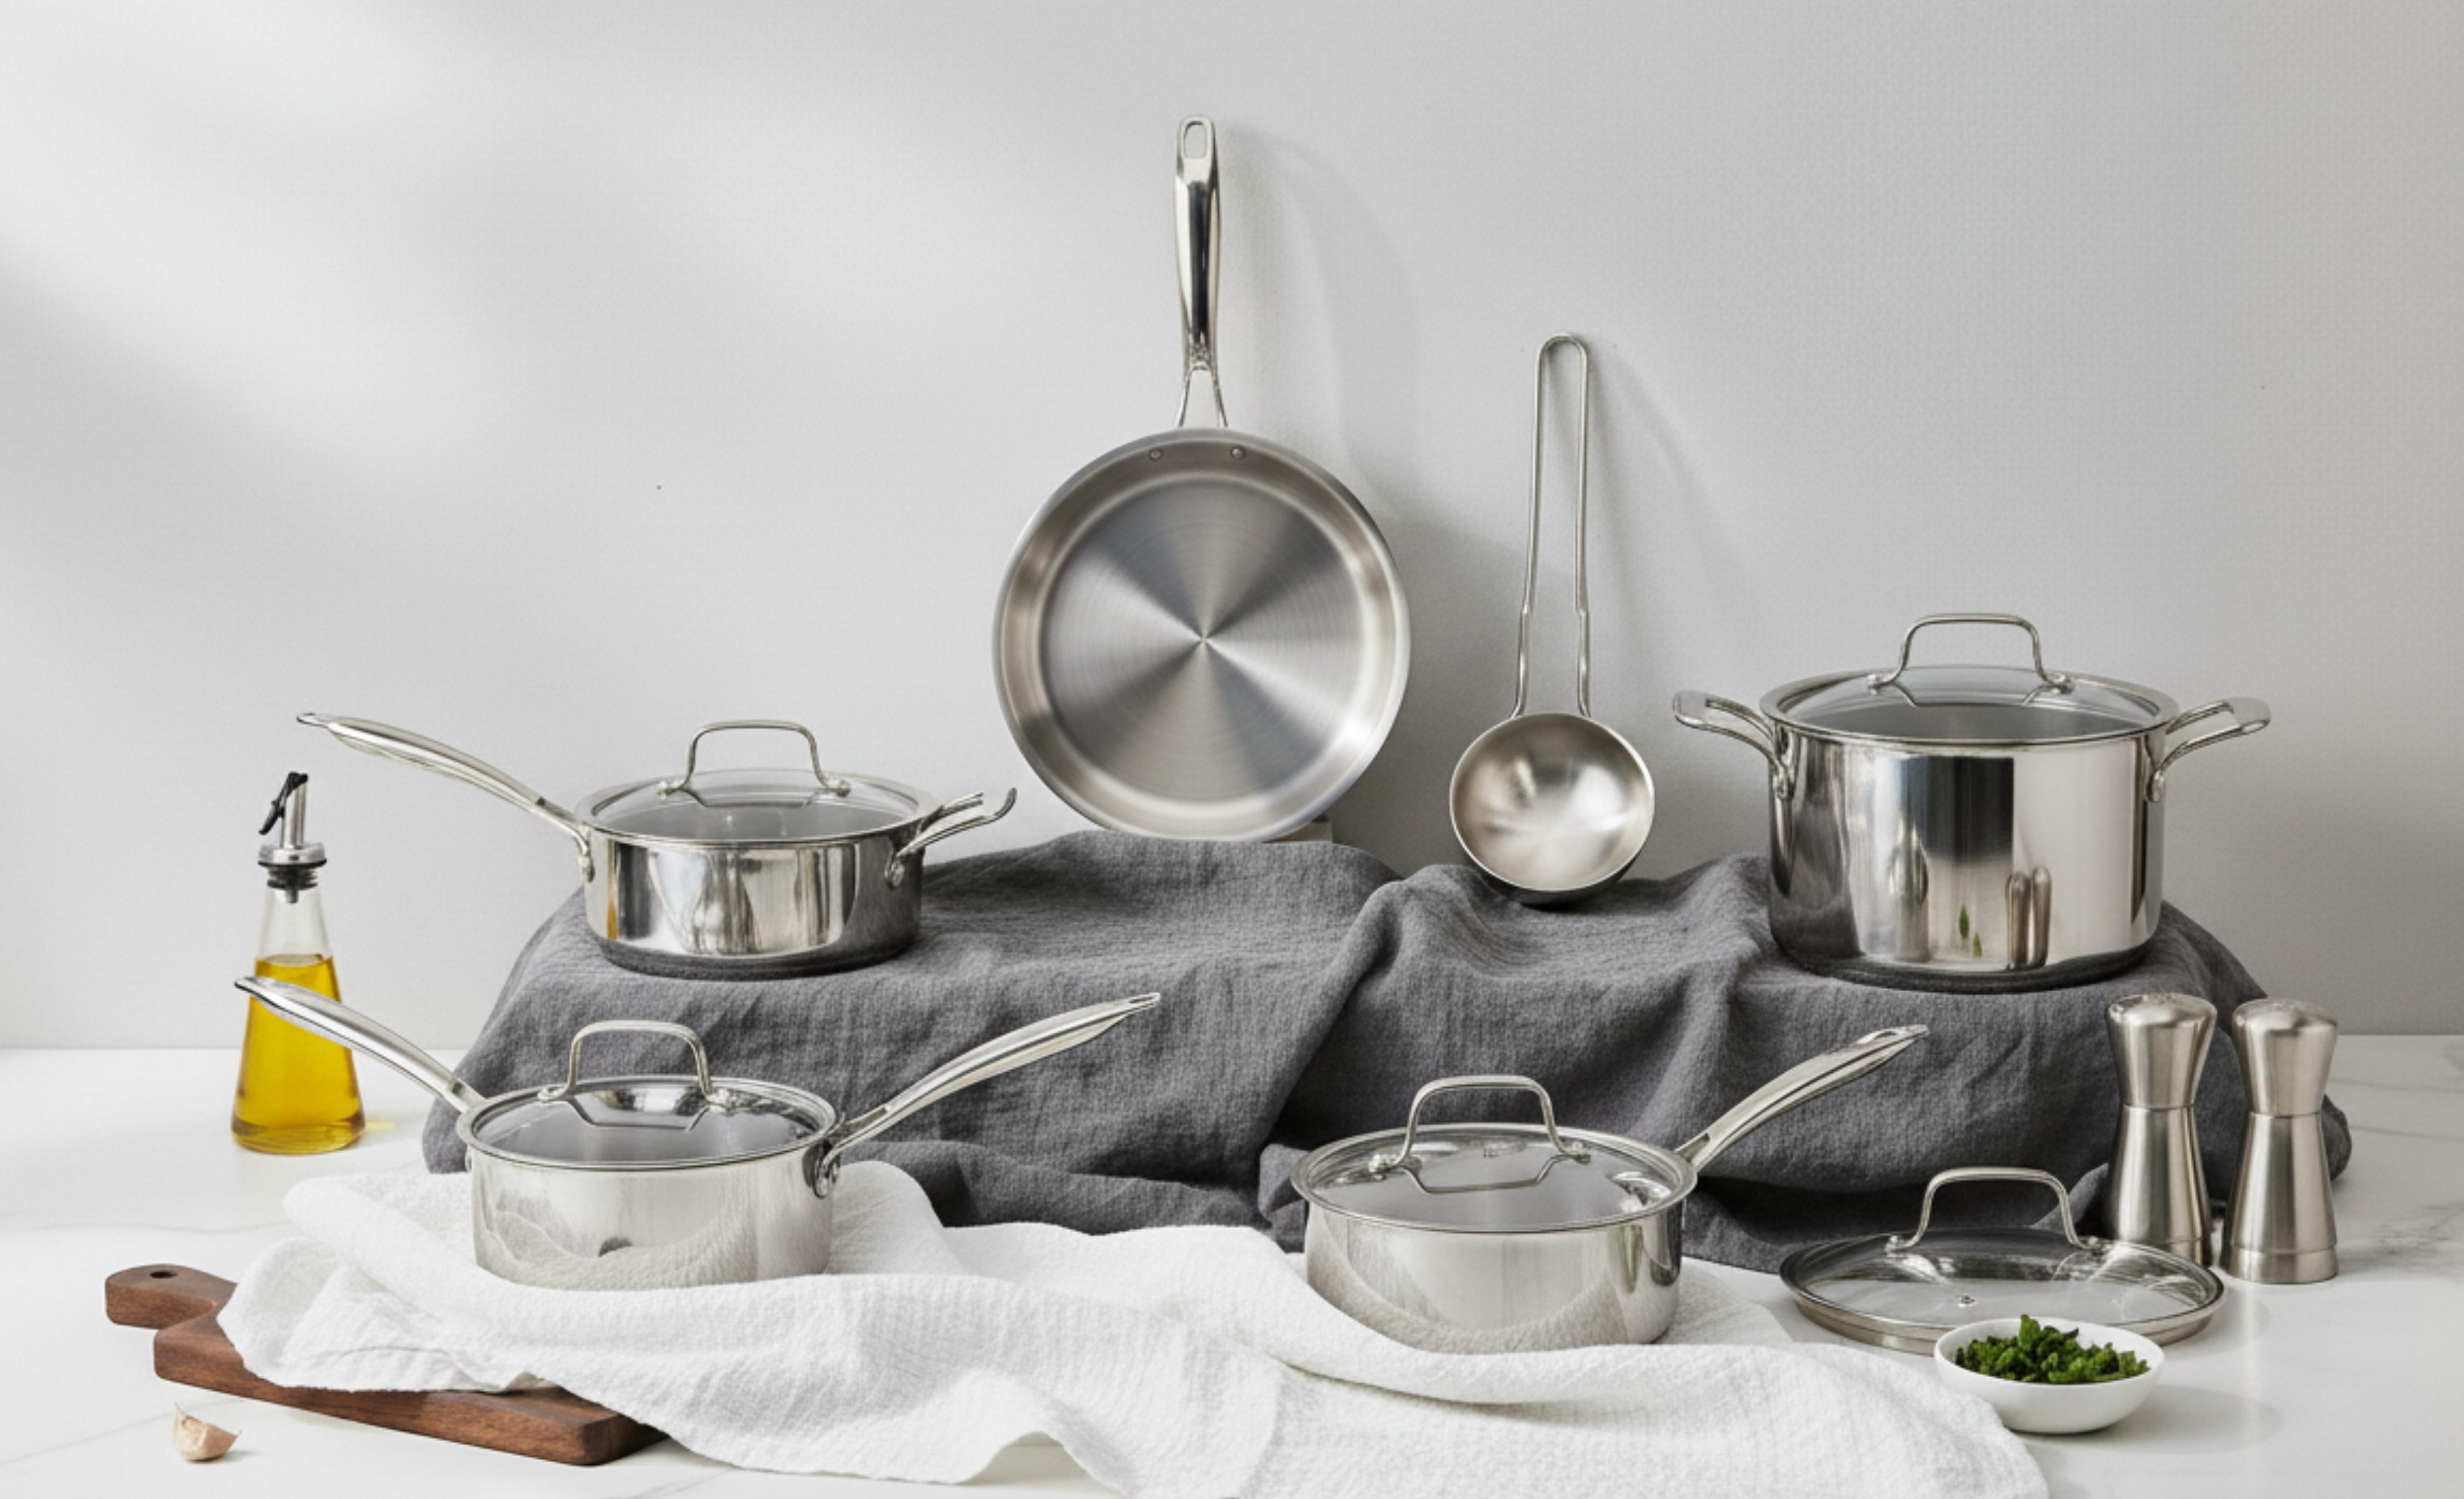
Three Easy Rajasthani Lunch Recipes | Step-by-Step Guide
Bring the vibrant flavors of Rajasthan into your kitchen with this guide to a classic thali. This collection of traditional Rajasthani recipes offers a journey through rich, aromatic dishes that are a cornerstone of Indian cuisine. With the help of the SUNCASA Tri Smart Cookware range, where the sturdy three-layered clad metal triply construction meets soulful cooking, we will cover three signature dishes: the rich and sweet Moong Dal Halwa, the creamy and savory Malai Pyaaz ki Sabzi, and the tangy Rajasthani Kadhi Pakoda.
Ingredients:
Moong Dal Halwa Ingredients
- 1 cup yellow moong dal, soaked for 3–4 hours
- ½ cup ghee
- 2 cups warm milk
- ¾ cup sugar
- ½ tsp cardamom powder
- A handful of chopped nuts (almonds, pistachios)
Malai Pyaaz ki Subzi
- 10–12 small onions (pearl onions)
- 2 tbsp ghee
- ½ tsp cumin seeds
- 1 tsp ginger-garlic paste
- 8–10 cashews, blended with 2 tbsp milk to make a paste
- ¼ cup plain curd (yogurt), whisked
- ½ cup milk
- ¼ cup heavy cream (malai)
- Spices: ¼ tsp turmeric powder, 1 tsp coriander powder, ½ tsp red chilli powder, salt to taste
- ¼ tsp garam masala
- Fresh coriander for garnish
Rajasthani Kadhi Pakoda
- 1 cup besan (gram flour)
- 1 medium onion, finely chopped
- 1 green chilli, finely chopped
- ½ tsp ajwain (carom seeds)
- A pinch of baking soda
- Salt to taste
- Water, as needed to make a thick batter
- Oil for deep frying
- 1 cup curd (sour yogurt is preferred)
- 2 tbsp besan (gram flour)
- 3 cups water
- Spices: ¼ tsp turmeric powder, ½ tsp red chilli powder, salt to taste
- 1 tbsp ghee
- ½ tsp mustard seeds
- ½ tsp cumin seeds
- 2 dried red chillies
- A pinch of hing
How to make it:
Moong Dal Halwa
- Drain the soaked moong dal completely and grind it into a coarse paste without adding water.
- Heat ½ cup of ghee in the SUNCASA Tri Smart Frypan on low heat. Add the moong dal paste.
- Roast the dal on low heat, stirring continuously, until it turns golden brown and releases a rich, nutty aroma. This may take 25-30 minutes.
- Pour in 2 cups of warm milk and continue to stir, cooking until the milk is fully absorbed by the dal.
- Add ¾ cup of sugar, ½ tsp of cardamom powder, and the chopped nuts. Mix well.
- Continue cooking and stirring until the halwa thickens and begins to leave the sides of the frypan. Serve warm.
Malai Pyaaz ki Sabzi
- In the SUNCASA Tri Smart Frypan, heat 2 tbsp of ghee. Sauté the small onions until they are golden brown and slightly soft. Remove them from the pan and set aside.
- In the same frypan, add ½ tsp of cumin seeds. Once they sizzle, add 1 tsp of ginger-garlic paste and sauté for a minute.
- Add the powdered spices: turmeric, coriander, chilli powder, and salt. Cook for another minute.
- Stir in the cashew paste and cook until the oil starts to separate.
- Lower the heat and slowly add the whisked curd, stirring constantly to prevent it from curdling.
- Pour in the milk and cream, stirring gently to combine. Let the gravy simmer for 5-7 minutes.
- Add the sautéed onions back into the gravy and cook for another 2-3 minutes until everything is well combined and the gravy is creamy.
- Finish with a sprinkle of garam masala and fresh coriander.
Kadhi Pakoda
- In a bowl, mix 1 cup of besan, chopped onion, green chilli, ajwain, salt, and a pinch of baking soda. Add a little water at a time to form a thick batter. Heat oil for frying and drop spoonfuls of the batter into the hot oil. Fry until the pakodas are golden and crisp. Drain and set aside.
- In a large bowl, whisk 1 cup of curd with 2 tbsp of besan until smooth. Add 3 cups of water, turmeric powder, chilli powder, and salt. Whisk again to ensure there are no lumps.
- Pour this mixture into the Tri Smart Kadai. Bring it to a boil over medium heat, stirring frequently.
- Once it boils, reduce the heat and let it simmer for about 20 minutes, allowing the kadhi to thicken and the raw taste of besan to cook out.
- Add the fried pakodas to the simmering kadhi and cook for another 5-7 minutes, so they absorb the flavors.
- Next, prepare the Tadka. Heat 1 tbsp of ghee in the SUNCASA Tri Smart Tadka Pan. Add mustard seeds, cumin seeds, dried red chillies, and a pinch of hing. Once the seeds crackle, pour this tempering over the finished kadhi.
The triple-layer construction provides superior heat control, helping you master everything from slow-roasting halwa to simmering a delicate kadhi. Creating authentic recipes like this Rajasthani lunch is a rewarding experience; and using the right tools, enhances the process and ensures delicious results.
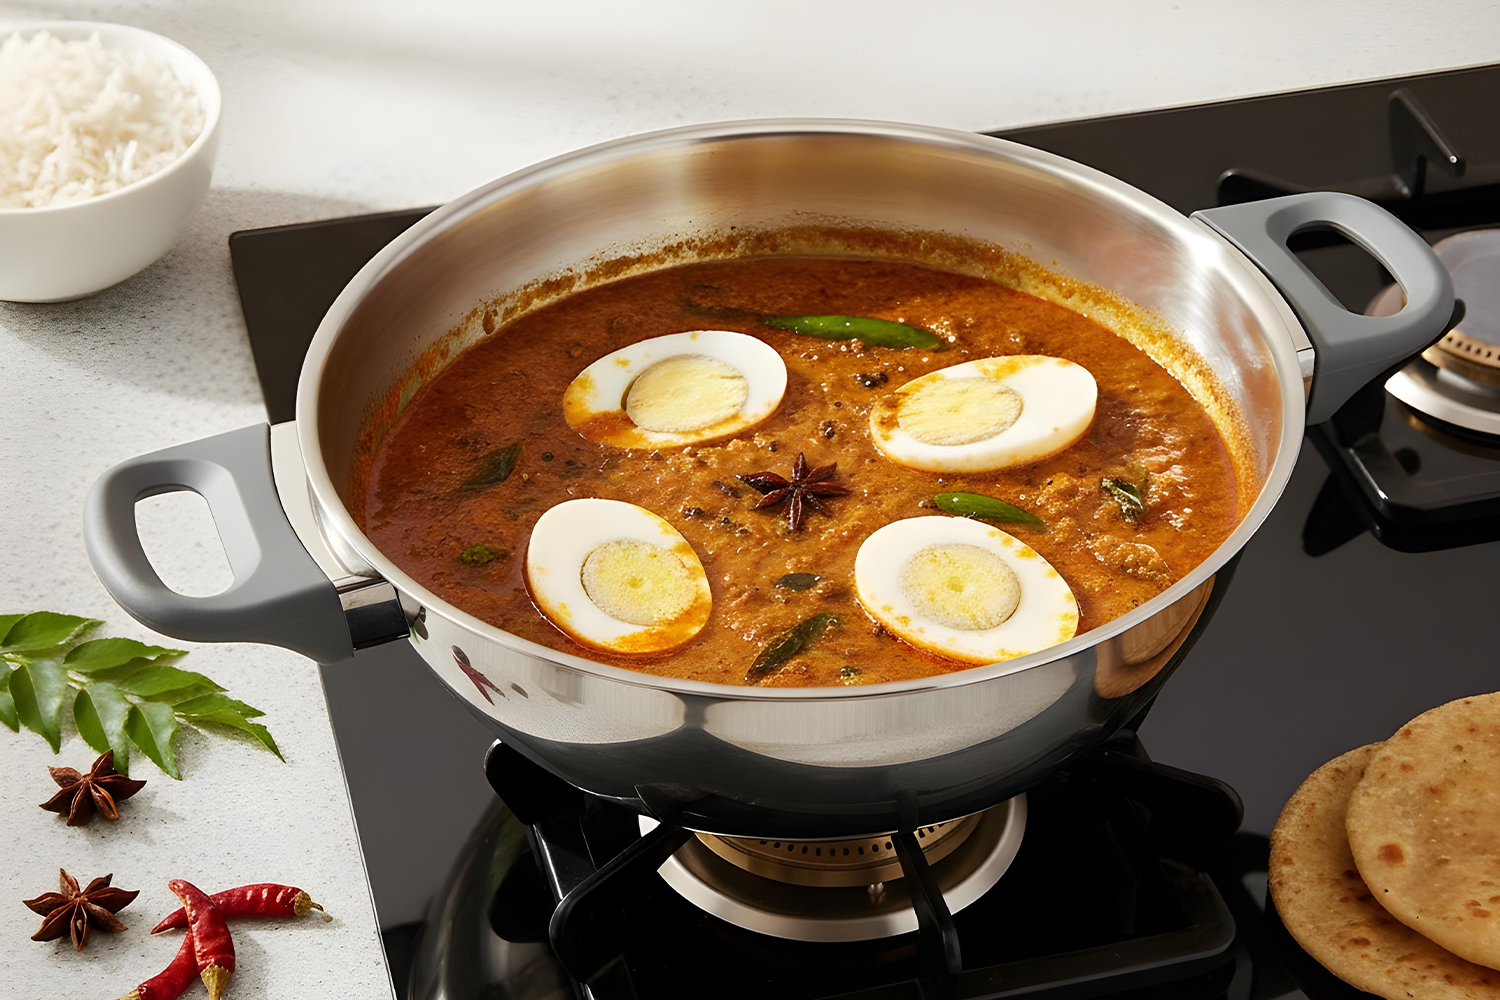
Chettinad Egg Curry | Easy one-pot South Indian recipe
Experience the spicy, aromatic magic of South India with this easy One-Pot Chettinad Egg Curry. This flavour-packed dish combines boiled eggs with a rich coconut-based masala, creating a hearty meal that's perfect for busy weeknights and family gatherings alike.
The best part? You can recreate this authentic dish in a single kadhai, reducing both cooking time and cleanup. Using the Suncasa Impact Pro Deep Kadhai makes the process even easier thanks to its even heat distribution, deep cooking surface, and durable stainless-steel construction.
Why You'll Love This One-Pot Chettinad Egg Curry
Chettinad Egg Curry is a wonderful balance of spice, aroma, and creamy coconut flavours. Unlike many elaborate South Indian curries, this version is designed for convenience without compromising on taste.
Whether served with steamed rice, dosa, appam, parotta, or roti, this curry makes a wholesome and satisfying meal. The one-pot method ensures all the flavours blend beautifully while keeping kitchen work to a minimum.
Ingredients (Serves 4)
Main Ingredients
- 6 eggs, boiled and peeled
- 2 tbsp oil
- 1½ tsp saunf (fennel seeds)
- 1 bay leaf
- 2 onions, finely chopped
- 2–3 green chillies, slit
- 2 tsp ginger-garlic paste
- 2 tomatoes, chopped
- ½ tsp haldi (turmeric)
- 1½ tsp red chilli powder
- 2 tsp coriander powder
- ¼ cup fresh grated coconut (or 2 tbsp desiccated coconut)
- ½ tsp black pepper
- 1 tsp garam masala (or Chettinad masala)
- Salt, as needed
- 1½ cups water
- Chopped coriander leaves
For Masala Paste (Optional, for More Flavour)
- 1 tbsp coconut
- 1 tbsp khus khus (poppy seeds)
- 1 tbsp roasted chana dal (optional)
- 1 dry red chilli
- ½ tsp whole black pepper
Easy Instructions
Step 1: Prepare the Eggs
Boil the eggs, peel them, and lightly prick them with a fork. This allows the curry flavours to seep into the eggs while cooking.
Step 2: Make the Masala Paste
Dry-roast coconut, khus khus, chana dal, red chilli, and pepper for about 2 minutes until aromatic. Grind with a little water to form a smooth paste.
Step 3: Build the Curry Base
Heat oil in your Suncasa stainless steel deep kadhai. Add bay leaf and saunf and allow them to splutter. Add onions and green chillies. Fry until the onions turn golden brown. Add ginger-garlic paste and sauté for 1 minute.
Step 4: Add the Spices
Add tomatoes, haldi, red chilli powder, coriander powder, and black pepper. Cook until the tomatoes become soft and the oil starts separating.
Step 5: Add the Coconut Mixture
Add the prepared masala paste along with the grated coconut. Fry for another 2 minutes to deepen the flavours.
Step 6: Simmer the Curry
Add salt and water. Mix well and gently add the boiled eggs. Cover and cook on low flame for 8–10 minutes.
Step 7: Finish and Serve
Sprinkle garam masala and fresh coriander leaves. Serve hot with rice, dosa, appam, or roti.
Pro Tip
Add a little coconut milk at the end for extra creaminess and a richer flavour profile.
Why the Suncasa Impact Pro Deep Kadhai Is Perfect for This Recipe
One-pot recipes require cookware that can handle sautéing, simmering, and slow cooking without creating hot spots. The Suncasa Impact Pro Deep Kadhai is specifically designed for versatile Indian cooking.
Its deep design comfortably accommodates curries, gravies, and one-pot meals while preventing spills during stirring and simmering. The glass lid helps retain moisture and allows you to monitor cooking without lifting the cover repeatedly.
Whether you're preparing everyday curries or elaborate festive dishes, this kadhai offers the reliability needed for consistent cooking results.
Suncasa Impact Pro Range
The Suncasa Impact Pro range is built to meet the demands of modern Indian kitchens while ensuring healthy and efficient cooking.
Made with 304 Grade Stainless Steel
Crafted using premium 304-grade stainless steel, the cookware offers excellent food safety and durability. This high food-grade material resists rust and corrosion while maintaining its shine for years.
Even Heat Distribution
The impact-forged heavy bottom ensures uniform heat distribution throughout the cooking surface. This helps prevent food from burning and supports consistent cooking results.
Stay Cool Handles
Ergonomically designed stay-cool handles provide a comfortable grip and make handling the cookware safer during cooking.
Multi-Cooktop Compatibility
The cookware works seamlessly across gas stoves, induction cooktops, ceramic hobs, and even ovens, offering flexibility for every kitchen setup.
Easy to Clean
The stainless-steel construction allows for easy maintenance and quick cleaning after cooking, making it ideal for daily use.
Built for Long-Term Performance
Its heavy-duty construction ensures strength, stability, and durability, making it a dependable addition to your cookware collection.
Conclusion
This One-Pot Chettinad Egg Curry brings together the authentic flavours of South Indian cuisine with the convenience of modern cooking. Rich spices, creamy coconut, and perfectly simmered eggs create a comforting meal that the entire family can enjoy.
When paired with the Suncasa Impact Pro Deep Kadhai, preparing this classic dish becomes even more effortless. Its premium stainless-steel construction, even heating, and versatile design help you achieve delicious results every time.

Dahi Aloo | Creamy, Tangy Potato Curry
Ingredients (Serves 4)
Instructions
- Boil potatoes till soft (you can pressure cook for 3–4 whistles). Peel and roughly crumble or cut them and keepaside.
- In a bowl, whisk curd and besan till smooth. Add 1½ cups water. Whisk again to form a thin, lump-free slurry. Set it aside.
- Heat oil in your Deep Kadhai, then add cumin seeds; let them crackle.
- Add onions; sauté till translucent. Add ginger, garlic, and green chili and fry for 30 seconds.
- Add curry leaves and hing; mix well.
- Add chopped tomatoes; cook till soft and oil separates (about 3–4 minutes).
- Add turmeric, red chili powder, coriander powder and mix well.
- Add crumbled potatoes and sauté for 2 minutes so potatoes are coated with masala.
- Pour Yogurt Mix, stirring quickly so the curd doesn’t split.
- Keep flame low and cook for 8–10 minutes till gravy thickens up. If it looks too thick, add a little water.
- Add salt and garam masala, and mix them well. Sprinkle fresh coriander to garnish it well.
- Serve hot with chapati, roti, or rice!
Pro Tips:
- For richer taste, add a spoon of ghee at the end.
- Always use fresh curd because sour yogurt can curdle more easily.
- Adjust spice and water for your family’s liking.

Haldi Sabzi | Comfort food from Jodhpur
Ingredients (Serves 5–6)
- 250g fresh haldi (turmeric roots)
- 80g ghee (about 6 tbsp), plus 2 tbsp extra
- 1 bay leaf
- 1 black cardamom
- 1 tbsp ginger, finely chopped
- 1 cup onion, finely chopped
- ½ tbsp green chili, chopped (adjust to taste)
- 1 tbsp garlic, chopped
- 1 tsp cumin seeds (jeera)
- 1 cup tomato, chopped
- 1 tsp salt (or to taste)
- ½ tsp red chili powder
- 1 tsp coriander powder
- 1 cup thick curd (yogurt), whisked
- 2 tsp besan (gram flour)
- ¼ cup green peas (fresh or frozen)
- ¼ cup spring onion, chopped
- 2 tbsp cashews
- 1 tbsp kasuri methi (dried fenugreek leaves)
- 1 tbsp fresh coriander, chopped
How to Make It
- Wash the turmeric roots well and peel off the skin. Then, grate them using a regular grater. (Tip: Wear gloves to avoid haldi stains.)
- Heat around 5½ tablespoons (80g) ghee in your Suncasa Cast Iron Frypan on medium flame.
- Add the grated haldi and sauté for 4–5 minutes, till it turns golden and smells nice. Remove and keep aside.
- In the same pan, add 2 tablespoons ghee. Add bay leaf and black cardamom, let them crackle.
- Add chopped ginger and fry for a minute. Then, put in onions and cook until golden.
- Add green chili, garlic, and jeera. Fry for 1–2 minutes. Add tomatoes. Cook until they turn soft and the ghee leaves the sides (about 5 minutes).
- Add salt, red chili powder, and coriander powder. Mix well.
- In a small bowl, whisk curd with besan (gram flour) till smooth. Lower the flame and slowly add this to the pan, stirring so that curd doesn’t split.
- Add peas, spring onion, and cashews. Put back the roasted turmeric. Mix everything gently so haldi gets coated well in the masala. Cover with the glass lid and simmer on low for 8–10 minutes.
- Sprinkle kasuri methi and coriander leaves on top.
- Serve hot with phulkas, rotis, or rice.
Pro tips:
- Adjust chili if you want less or more spice.
- Add some water if you’d like a thinner curry.
- Drizzle extra ghee for a richer taste.
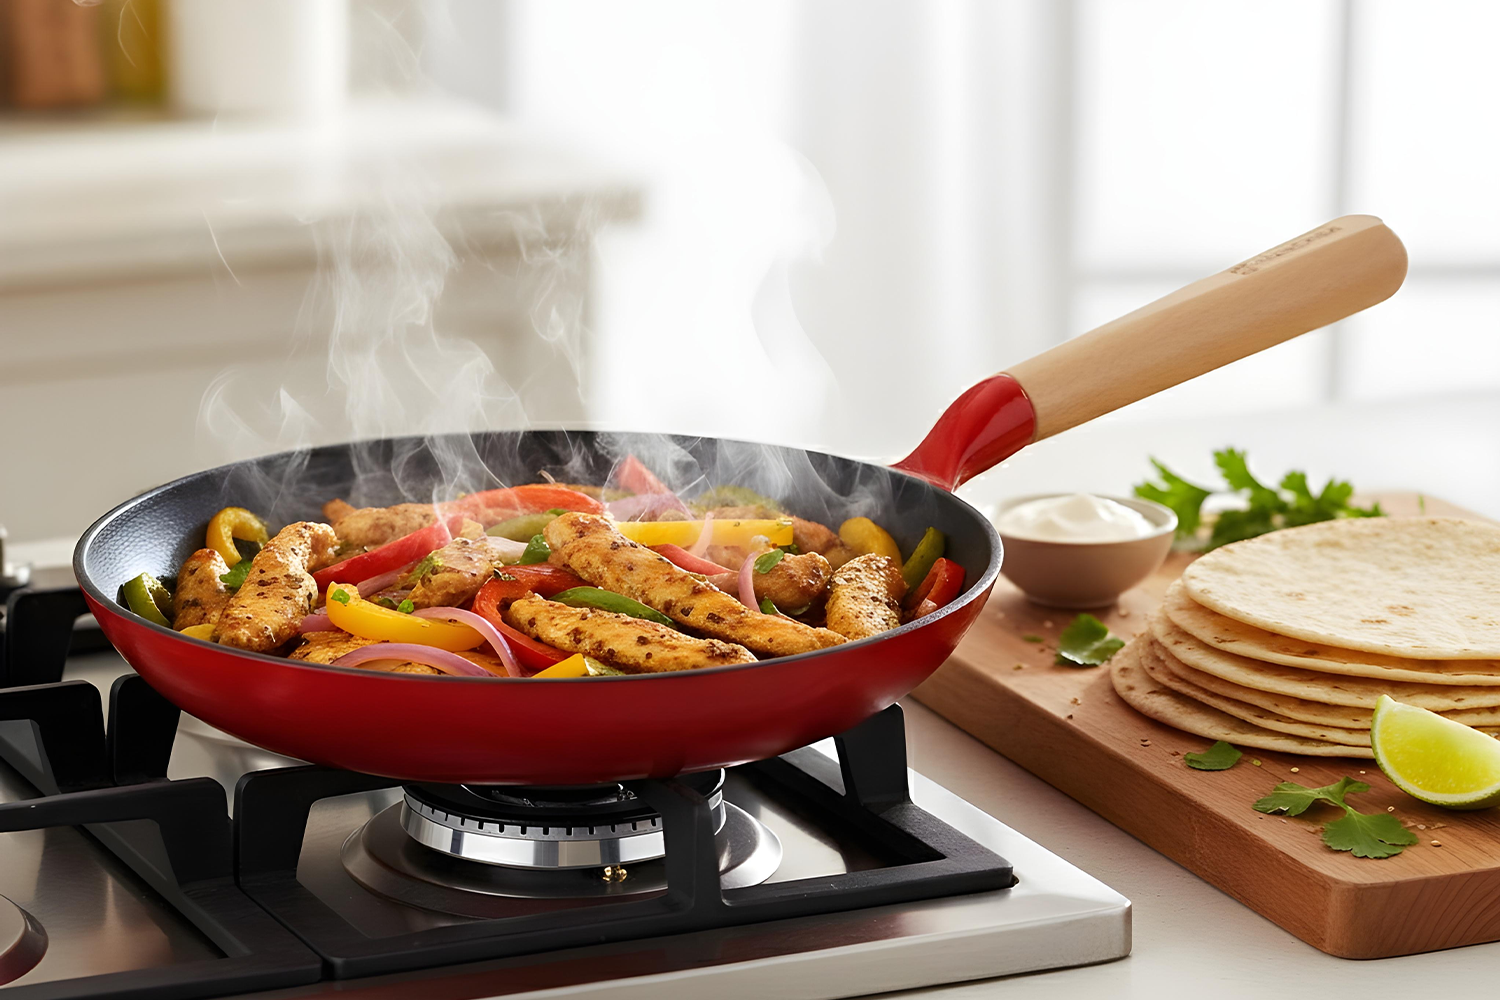
Easy Indian Style Chicken Fajita Recipe: Quick One-Pan Meal
For times when you want to indulge in juicy, flavorful chicken strips tossed with vibrant peppers and onions, there’s a magical dish called Chicken Fajita. This globally loved recipe gets a delicious Indian twist with aromatic spices, yogurt-marinated chicken, and fresh vegetables cooked together in a single pan.
The beauty of this dish lies in its simplicity. Everything is pan-seared in an irresistible Indian-spiced marinade, creating a meal that's packed with flavor, texture, and color. In this blog, we’ll share a foolproof chicken fajita recipe using the SUNCASA Castella Frypan that will definitely make your weekday meals and cravings much simpler.
Why You'll Love This Indian Chicken Fajita
Chicken Fajitas are traditionally known for their smoky flavors, sizzling presentation, and colorful vegetables. This Indian-inspired version takes those familiar elements and enhances them with spices commonly found in Indian kitchens.
The combination of yogurt, garam masala, ginger, garlic, and lime creates a rich marinade that keeps the chicken tender while infusing it with layers of flavor. Paired with crisp bell peppers and onions, the result is a wholesome, satisfying dish that comes together in just one pan.
Ingredients (Serves 4)
For the Chicken Fajita
- 500g boneless chicken breast or thigh, cut into thin strips
- 2 tbsp oil (any neutral or olive oil)
- 1 large onion, sliced
- 1 large red bell pepper, sliced
- 1 large green bell pepper, sliced
- 1 tsp cumin powder
- 1½ tsp Kashmiri red chili powder (or paprika)
- 1 tsp coriander powder
- ½ tsp turmeric powder
- 2 tsp garam masala
- 4 garlic cloves, minced
- 1 inch ginger, grated
- 2 tbsp thick yogurt (for extra tenderness)
- Juice of ½ lime
- 1 tsp salt (adjust to taste)
- A handful of fresh coriander, chopped (for garnish)
- Warm tortillas or roti (to serve)
How to Make It
Step 1: Marinate the Chicken
In a large bowl, combine yogurt, cumin powder, Kashmiri red chili powder, coriander powder, turmeric, garam masala, ginger, garlic, lime juice, salt, and half the oil. Mix well to create a flavorful marinade. Add the chicken strips and coat thoroughly. Allow the chicken to marinate for at least 20 minutes. For a deeper flavor, marinate for up to 2 hours.
Step 2: Sauté the Vegetables
Heat your Cast Iron Frypan over medium-high heat until hot. Add the remaining oil and sauté the sliced onions and bell peppers for 3–4 minutes. Cook until they are slightly softened but still retain a pleasant crunch. Remove the vegetables and set aside.
Step 3: Cook the Chicken
Add the marinated chicken strips to the same pan. Cook on high heat for 6–8 minutes, stirring occasionally. The chicken should be fully cooked with beautifully browned edges that add extra flavor.
Step 4: Combine Everything
Return the sautéed onions and peppers to the pan. Toss everything together over high heat for about 2 minutes so the flavors combine while the vegetables remain crisp and vibrant.
Step 5: Garnish and Serve
Finish with freshly chopped coriander. Serve sizzling hot directly from your Suncasa cookware for a premium dining experience. Enjoy with warm tortillas, rotis, wraps, or as part of a complete family dinner spread.
Serving Suggestions & Pro Tips
Want to elevate the flavor even further? Sprinkle a little chaat masala over the finished dish just before serving. You can also serve these fajitas with mint yogurt dip, fresh salad, grilled vegetables, or homemade salsa for a restaurant-style experience.
The rustic charm of Suncasa’s affordable yet healthy cast-iron frypan locks in authentic taste and helps create the perfect sear on both the chicken and vegetables, making these fajitas a showstopper at any meal.
Why the SUNCASA Castella Frypan Is Perfect for Chicken Fajitas
A good fajita recipe depends heavily on high-heat cooking. The ability to quickly sear chicken while keeping its juices and creating caramelized edges is what makes the dish so delicious.
The SUNCASA Castella Pre-Seasoned Cast Iron Frypan is designed to handle exactly this type of cooking. Its excellent heat retention allows the pan to stay consistently hot, helping create the characteristic fajita sizzle while ensuring even cooking throughout.
The ergonomic wooden handle provides a comfortable grip, while the durable construction makes it suitable for daily cooking. Whether you're making fajitas, stir-fries, cutlets, omelets, or pan-seared vegetables, this frypan offers exceptional versatility for modern kitchens.
SUNCASA Castella Range Features
The Castella range combines traditional cast iron cooking with modern convenience, delivering healthier and more efficient cooking experiences.
- Pure Iron Ore Construction: Crafted from pure iron ore, the frypan offers durability and long-lasting performance while maintaining authentic cooking results.
- Naturally Non-Stick Surface: The pre-seasoned surface develops natural non-stick properties over time, reducing the need for excessive oil and making cooking healthier.
- No Chemical Coatings: Unlike many conventional cookware options, the Castella Frypan contains no chemical coating and is completely metal spatula safe.
- 100% Non-Toxic Cooking: The cookware contains no PTFE, PFOA, PFAS, or harmful synthetic coatings, ensuring safer cooking for everyday meals.
- Zero Metal Leaching: Even when cooking acidic foods at high temperatures, the frypan is designed to provide a safe cooking experience with zero metal leaching.
- Quick Heating Performance: The pan heats up quickly and retains heat effectively, helping reduce cooking time while improving browning and flavor development.
- Exterior Enamel Coating: The exterior enamel coating enhances durability while making maintenance easier and helping resist stains and rust.
- Compatible Across Multiple Cooktops: Suitable for gas, electric, ceramic, induction, glass cooktops, and oven use, offering complete flexibility in the kitchen.
- Ergonomic Wooden Handle: Designed for comfortable handling, the wooden handle remains easy to grip and maneuver during cooking.
Conclusion
This Indian-Style Chicken Fajita is the perfect combination of bold flavors, vibrant vegetables, and tender marinated chicken. Easy to prepare and packed with taste, it delivers restaurant-quality results with minimal effort.
Using the SUNCASA Castella Frypan further enhances the experience by providing excellent heat retention, healthy cooking benefits, and long-lasting durability. Whether you're preparing a quick family dinner or hosting friends for a casual gathering, this one-pan recipe is guaranteed to impress.
Bring together authentic flavors, healthy cooking, and premium cookware with this delicious Chicken Fajita recipe and make every meal memorable.
FAQs
1. Why is cast iron cookware ideal for making Chicken Fajitas?
Cast iron retains and distributes heat exceptionally well, helping achieve the high-temperature sear needed for fajitas. This creates beautifully browned chicken and crisp vegetables while locking in natural juices and flavor.
2. Is the SUNCASA Castella Frypan safe for healthy cooking?
Yes. The SUNCASA Castella Frypan is made from pure iron ore and contains no PTFE, PFOA, PFAS, or chemical coatings. It offers a naturally non-stick cooking surface that supports healthier cooking with less oil.
3. Can I use the SUNCASA Castella Frypan on induction cooktops?
Absolutely. The frypan is compatible with gas, induction, electric, ceramic, glass cooktops, and oven cooking, making it suitable for a wide variety of kitchen setups.
4. How can I keep the chicken tender in this fajita recipe?
Marinating the chicken in yogurt, spices, and lime juice helps break down proteins gently, resulting in juicy, tender chicken with enhanced flavor and improved texture.
5. What other recipes can I prepare in the SUNCASA Castella Frypan?
The frypan is versatile enough for stir-fries, omelets, grilled sandwiches, cutlets, kebabs, sautéed vegetables, dosas, parathas, pan-seared meats, and numerous everyday Indian and international recipes.

Butter Chicken | Quick and Easy Indian Style One-pot Recipe
Ingredients (Serves 4)
- 1 tbsp oil
- 1 tbsp butter
- 1 onion, diced
- 1 tsp grated ginger
- 2 garlic cloves, minced
- 500 g boneless chicken (breast or thigh), cubed
- 4 Tbsp tomato paste (or ½ cup tomato sauce)
- 1 tsp garam masala
- 1 tsp cumin powder
- 1 tsp chilli powder or paprika
- 1 tsp fenugreek powder (optional)
- Salt & pepper, to taste
- 1 cup heavy cream (or half‑and‑half/yogurt mix)
- Fresh coriander, for garnish
How to Make It
- Heat oil and butter in the stainless steel fry pan over medium heat.
- Dice onion on the SUNCASA Essentra Chopping Board, cook for 3–4 minutes until soft.
- Add ginger and garlic, cook 30 seconds.
- Add chicken, tomato paste, and all spices. Cook 5–6 minutes, stirring until chicken is cooked through.
- Stir in cream and simmer for 8–10 minutes until the sauce is rich and silky.
- Garnish with coriander. Serve hot with rice or naan.
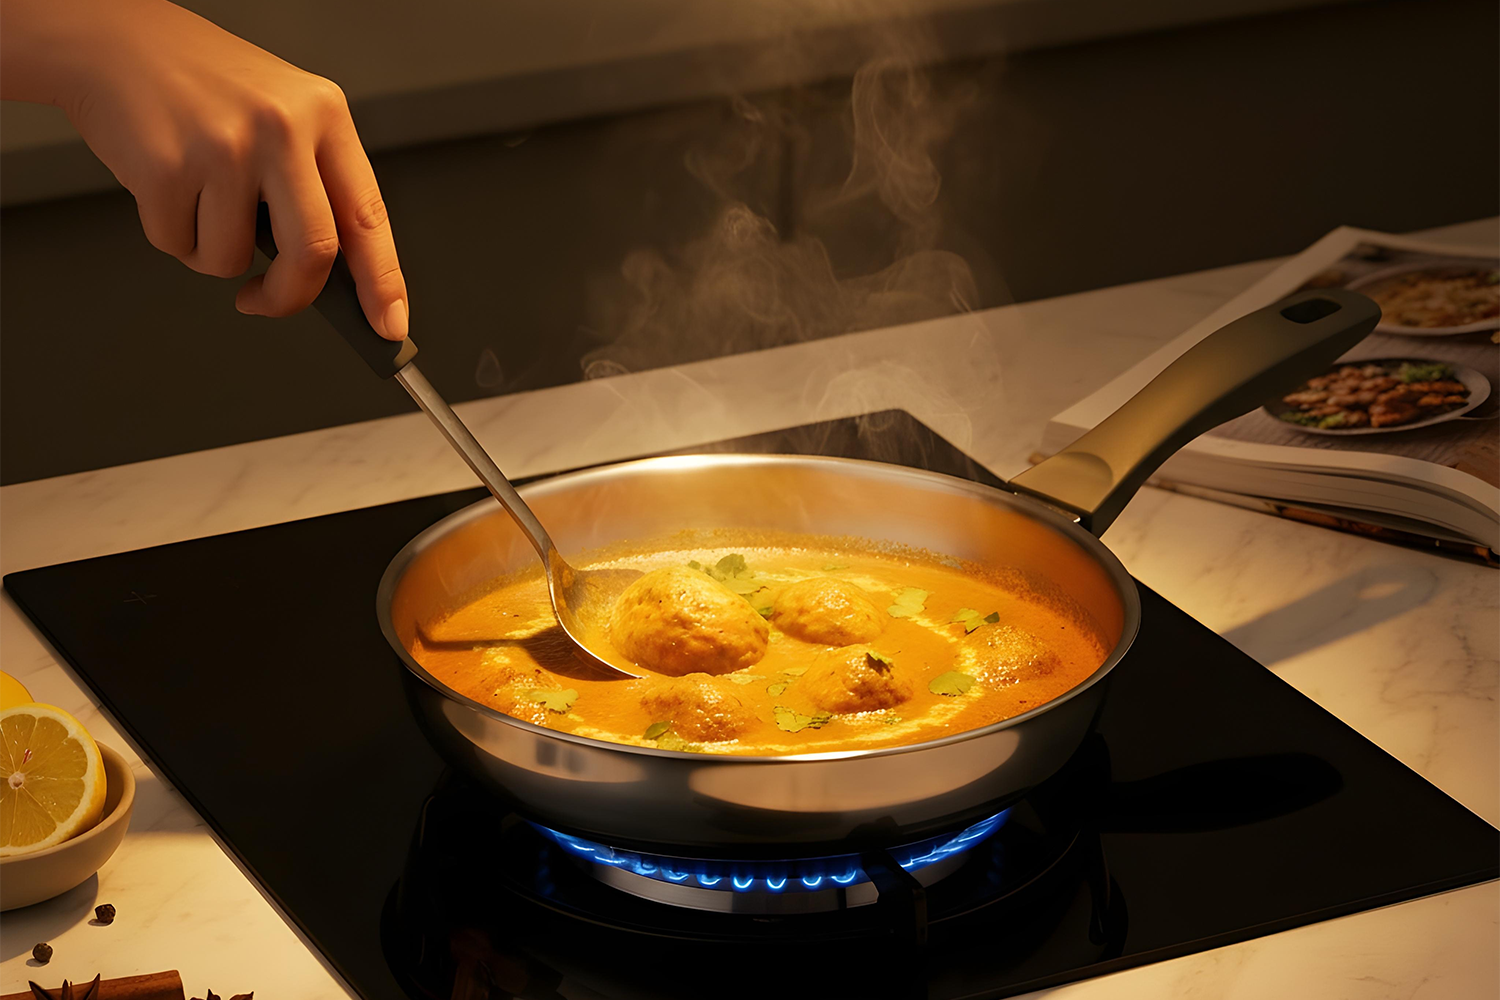
One-Pan Malai Kofta Recipe: Easy North Indian Paneer Dish
Tired of the same paneer dishes and craving something richer, creamier, and a little more special? Enter Malai Kofta: soft paneer and potato koftas simmered in a luscious tomato-cashew gravy that feels like a restaurant treat but can be prepared right at home.
This one-pan version simplifies the cooking process without compromising on flavor. Using the Suncasa Impact Pro Frypan, you can achieve perfectly golden koftas and a silky, aromatic gravy, all in a single pan. Whether you're preparing a family dinner, hosting guests, or simply treating yourself to a comforting meal, this malai kofta recipe delivers indulgent flavors with minimal effort.
Why You'll Love This One-Pan Malai Kofta
Malai Kofta is one of the most loved North Indian dishes, known for its rich texture and luxurious gravy. Traditionally, it can involve multiple cooking vessels and lengthy preparation. However, this simplified recipe keeps things easy and efficient while maintaining the authentic flavors that make Malai Kofta so popular.
The combination of paneer, potatoes, tomatoes, cashews, and cream creates a dish that's rich, satisfying, and perfect for serving with naan, roti, paratha, or jeera rice. Best of all, everything comes together in one frypan, reducing cleanup and making weeknight cooking far more manageable.
Ingredients (Serves 4)
For the Koftas
- 1 cup grated paneer
- 1 cup boiled, mashed potatoes
- 2 tbsp cornflour or besan
- ½ tsp garam masala
- Salt, to taste
- Oil or ghee for frying
For the Gravy
- 1 tbsp ghee or oil
- 1 small onion, finely chopped
- 1 tsp ginger-garlic paste
- 2 tomatoes, pureed
- 10–12 cashews, soaked and blended into a paste
- ½ tsp turmeric
- 1 tsp Kashmiri red chilli powder
- 1 tsp garam masala
- Salt, to taste
- ¾ cup water or stock
- 2 tbsp cream or malai
- Fresh coriander, for garnish
How to Make It
Step 1: Prepare the Koftas
In a mixing bowl, combine grated paneer, mashed potatoes, cornflour (or besan), garam masala, and salt. Mix until smooth and shape into 8 small balls. Ensure the mixture holds together well for easy frying.
Step 2: Fry the Koftas
Heat ghee or oil in your Suncasa Impact Pro Frypan. Shallow-fry the koftas until they turn golden brown on all sides. The even heat distribution of the frypan helps achieve a consistent golden crust. Once done, remove the koftas and set them aside.
Step 3: Build the Gravy Base
Using the same pan, add a little more ghee if needed. Sauté the finely chopped onions until soft and translucent. Add ginger-garlic paste and cook for about a minute until fragrant.
Step 4: Add Tomatoes and Cashews
Add the tomato puree and cashew paste. Cook for 2–3 minutes until the mixture thickens and the oil begins to separate from the masala.
Step 5: Add the Spices
Stir in turmeric, Kashmiri red chilli powder, garam masala, and salt. Add water or stock and mix well. Allow the gravy to simmer gently for 3–4 minutes.
Step 6: Add the Koftas
Carefully place the fried koftas into the gravy. Simmer for another 3–4 minutes so the koftas absorb the rich flavors of the sauce while remaining soft and tender.
Step 7: Finish and Serve
Stir in the cream or malai for added richness.
Garnish with fresh coriander and serve hot. No need for extra pans—just one frypan, one elegant dinner set, and a restaurant-style meal ready in under 20 minutes.
Why the Suncasa Impact Pro Frypan Is Perfect for This Recipe
A malai kofta recipe requires cookware that can handle both shallow frying and gravy preparation without causing uneven cooking. The Suncasa Impact Pro Stainless Steel Frypan is designed to deliver precisely that.
Its impact-forged heavy bottom ensures even heat distribution, helping koftas cook uniformly while preventing the gravy from scorching. The spacious cooking surface allows ingredients to sauté properly, helping develop deeper flavors.
The frypan's premium stainless-steel construction also makes it suitable for everyday use, whether you're preparing curries, stir-fries, sautéed vegetables, breakfast dishes, or one-pan meals. For home cooks looking for versatility, durability, and convenience, this frypan is an excellent addition to the kitchen.
Suncasa Impact Pro Range Features
The Suncasa Impact Pro cookware collection combines premium materials with thoughtful design to support healthier and more efficient cooking.
- Made with 304 Grade Stainless Steel: Constructed using the highest food-grade 304 stainless steel, the cookware offers excellent durability, corrosion resistance, and food safety.
- Even Heat Distribution: The impact-forged heavy bottom distributes heat evenly throughout the pan, reducing hot spots and ensuring consistent cooking results.
- Stay Cool Handles: Designed for safety and convenience, the stay-cool handles provide a comfortable grip and easier handling during cooking.
- Compatible with Multiple Cooktops: The cookware works seamlessly on gas stoves, induction cooktops, ceramic hobs, and even ovens, making it suitable for modern kitchens.
- Easy to Clean: The smooth stainless-steel surface allows for effortless cleaning and maintenance, making it ideal for everyday cooking.
- Built for Long-Term Performance: Its sturdy construction and premium materials ensure durability and reliable performance for years of regular use.
Conclusion
This One-Pan malai kofta recipe proves that restaurant-style dishes don't have to be complicated. Combining soft paneer-potato koftas with a rich tomato-cashew gravy, it delivers indulgent flavors in a simple and approachable format.
Using the Suncasa Impact Pro Frypan makes the cooking process even smoother, helping you achieve perfectly cooked koftas and a silky gravy with minimal effort. Whether you're cooking for family, entertaining guests, or simply satisfying a craving, this recipe is a delicious way to elevate your everyday meals.
Bring home the convenience of one-pan cooking and the reliability of premium cookware with the Suncasa Impact Pro Frypan.
FAQs
1. Can I prepare Malai Kofta in advance?
Yes. You can prepare the koftas and gravy separately in advance. Store them refrigerated and combine them shortly before serving to maintain the koftas' texture and prevent them from becoming overly soft.
2. Why is the Suncasa Impact Pro Frypan suitable for Malai Kofta?
The frypan's impact-forged heavy bottom ensures even heat distribution, allowing koftas to fry evenly while preventing the gravy from sticking or burning, making it ideal for one-pan recipes.
3. Can I use the Suncasa Impact Pro Frypan on an induction cooktop?
Absolutely. The Suncasa Impact Pro Frypan is compatible with induction, gas, ceramic, and oven cooking, providing flexibility for various kitchen setups.
4. How can I make this Malai Kofta recipe healthier?
You can air-fry or bake the koftas instead of shallow frying and use fresh cream in moderation. The rich cashew and tomato gravy will still provide excellent flavor and texture.
5. What other dishes can I prepare in the Suncasa Impact Pro Frypan?
The frypan is versatile enough for curries, stir-fries, sautéed vegetables, paneer dishes, breakfast recipes, cutlets, pasta, and a wide range of everyday Indian and international meals.

Carrot & Pineapple Soup | A Sweet-Savory Twist for Healthy Eating
Ingredients (Serves 2–3)
How to Make It
- On your SUNCASA Essentra Chopping Board, slice onion, garlic, and ginger. Sauté for 2–3 minutes until fragrant.
- In your Tri-Smart saucepan, heat olive oil. Add chopped carrots and pineapple. Stir for a minute. Add water or stock, bring to a boil, then reduce to simmer.
- Cover and cook for 10–12 minutes, or until carrots are soft.
- Let it cool slightly. Use a blender or immersion blender to puree into a smooth soup.
- Return to the saucepan. Add salt and pepper to taste. Reheat gently if needed. Add lemon juice or garnish if desired.
- Perfect with a slice of multigrain toast or a handful of roasted seeds on top.

Bread Upma | Easy to Cook DIY Dish
Ingredients (Serves 2–3)
How to Make It
- Cut bread into bite-sized cubes. Keep crusts if you like.
- Heat oil in your Suncasa sautepan.
- Add mustard seeds, let them splutter. Then add cumin, curry leaves, and green chillies.
- Sauté onions until translucent. Add tomatoes or other veggies, cook until soft.
- Add turmeric and salt. Sprinkle a little water if needed.
- Add bread cubes, toss gently to coat in the masala.
- Cook on medium heat for 3–4 minutes until bread edges are lightly crisp.
- Finish with a squeeze of lemon and garnish with coriander.
- Serve hot in a stylish SUNCASA Belly Shaped Casserole with chai, coffee, or plain dahi.
Make It Your Own
- Add roasted peanuts or cashews for crunch
- Sprinkle pav bhaji masala for street-style vibes
- Use millet or multigrain bread for a healthier twist
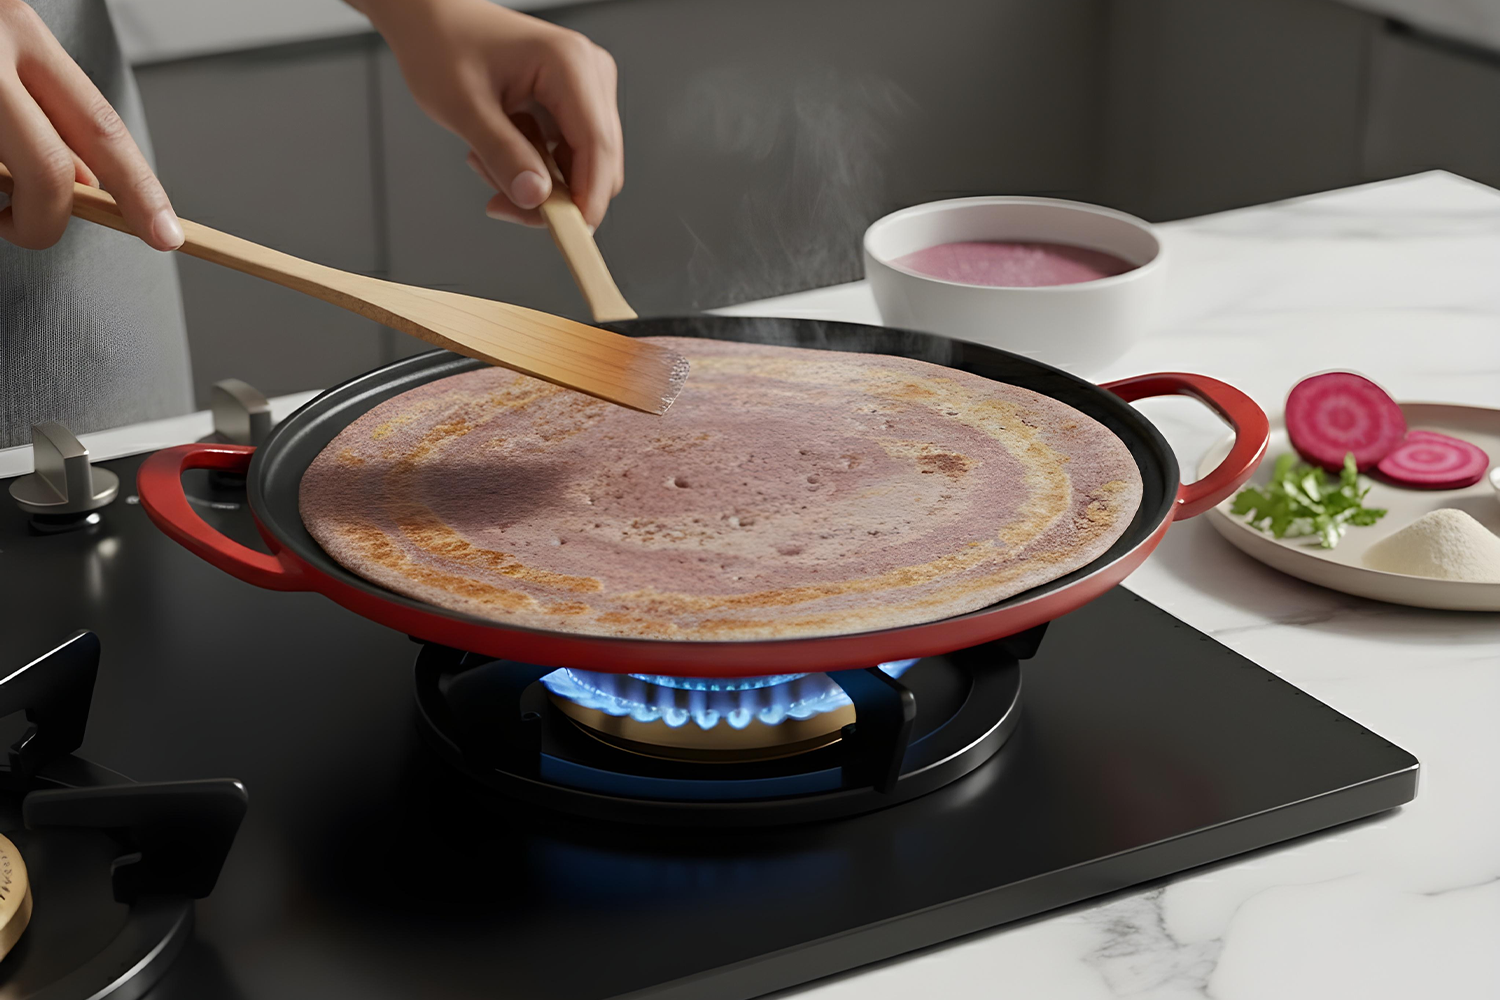
Ragi Beetroot Dosa | A Healthy Twist to Your Morning Routine
If you're looking to make your meals more colourful, gut-friendly, and nutrient-packed, this Ragi Beetroot Dosa is a great addition to your weekly menu. Made with calcium-rich finger millet and iron-loaded beetroot, it's light, gluten-free, and high in plant-based fibre. Perfect for those searching for easy, healthy Indian recipes or looking to explore millet-based meals, this dosa combines traditional ingredients with modern healthy eating habits.
For this recipe, we're using the Suncasa Castella Dosa Tawa, designed to deliver even heating and excellent cooking performance for crispy, flavourful dosas every time.
Ingredients (Makes 6–8 Dosas)
- 1 cup ragi flour (nachni)
- 1 small beetroot (grated or pureed)
- 2 tbsp rice flour
- ½ tsp cumin seeds
- Salt to taste
- Water as needed
- Oil or ghee for cooking
Optional Additions
- Chopped onions
- Coriander leaves
- Green chillies
- Curry leaves
These optional ingredients add extra texture and flavour while keeping the recipe nutritious and delicious.
How to Make Ragi Beetroot Dosa
Step 1: Prepare the Beetroot
Grate or blend one small beetroot into a smooth puree.
Step 2: Prepare the Batter
In a mixing bowl, combine:
- 1 cup ragi flour
- Beetroot puree
- 2 tbsp rice flour
- ½ tsp cumin seeds
- Salt to taste
- Water (enough for a thin, flowing batter)
Mix everything well until smooth.
Step 3: Rest the Batter
Allow the batter to rest for 15-20 minutes. This helps the ingredients combine properly and improves the texture of the dosa.
Step 4: Heat the Tawa
Place your Suncasa Castella Dosa Tawa on the stove and heat it well.
Step 5: Cook the Dosa
- Drizzle a little oil on the tawa.
- Pour the batter from the edges toward the centre, similar to making a rava dosa.
- Do not spread the batter with a ladle.
- Allow natural lacy holes to form.
Step 6: Crisp and Serve
Cook on medium-high heat until the edges become crisp. Add a few drops of ghee for extra flavour. Flip if desired, or serve as a traditional single-sided ragi beetroot dosa. Serve hot with coconut chutney, mint chutney, or fresh curd.
Why Ragi Beetroot Dosa Deserves a Place in Your Meal Plan
Healthy eating does not have to be complicated. This simple dosa recipe combines two nutrient-dense ingredients that offer multiple health benefits.
Benefits of Ragi
Ragi, also known as finger millet, is one of India's most nutritious grains. It is naturally gluten-free and rich in:
- Calcium for bone health
- Dietary fibre for digestion
- Plant-based protein
- Essential minerals like magnesium and phosphorus
Benefits of Beetroot
Beetroot adds natural sweetness, colour, and nutrition to the dosa batter. It is known for being rich in:
- Iron
- Folate
- Antioxidants
- Dietary fibre
Together, these ingredients create a wholesome meal that supports overall wellness while adding vibrant colour to your plate.
A Wholesome Recipe Deserves Premium Cast Iron Cookware
The quality of your cookware can significantly impact the final result of your dosa. The Suncasa Pre-Seasoned Cast Iron Dosa Tawa is specifically designed to help home cooks achieve better texture, even cooking, and enhanced flavour.
Key Benefits of the Castella Dosa Tawa
|
Feature |
Benefit |
|
Pure Iron Ore Construction |
Provides authentic cast iron cooking performance |
|
Quick to Heat |
Reduces waiting time before cooking |
|
Fast Cooking Performance |
Helps create perfectly crisp dosas |
|
Naturally Non-Stick Surface |
Requires less oil during cooking |
|
No Chemical Coating |
Safer and healthier cooking experience |
|
Metal Spatula Safe |
Durable enough for daily use |
|
Ergonomic Wooden Handle |
Comfortable and secure handling |
|
Stain and Rust Resistant |
Easier maintenance and longer life |
Tips for Getting the Perfect Crispy Ragi Beetroot Dosa
- Ensure the batter is thin and flowing.
- Always preheat the tawa properly before pouring the batter.
- Avoid spreading the batter manually.
- Use medium-high heat for the best texture.
- Add a few drops of ghee for enhanced flavour and crispness.
Following these simple tips can help you achieve restaurant-style results at home.
Conclusion
This Ragi Beetroot Dosa is a simple yet nutritious recipe that brings together traditional ingredients and healthy cooking practices. Paired with the Suncasa Castella Dosa Tawa, it becomes even easier to achieve crisp, evenly cooked dosas with minimal oil. If you're looking to upgrade your healthy cooking routine, explore the complete Suncasa Castella cookware range and discover how premium cast iron cookware can transform everyday meals.

High Protein Veg Wrap | A Quick & Healthy Indian-Style Meal
Ingredients
Instructions
- Heat 1 tsp oil in the cast iron pan.
- Add cumin seeds and let them crackle.
- Toss in onion, capsicum, and cabbage. Sauté on high flame for 2–3 mins.
- Add turmeric, chilli powder, and salt. Mix well.
- Add crumbled paneer. Cook for 2–3 mins until combined.
- Turn off the heat. Squeeze lemon juice and garnish with coriander.
- Warm the roti/wrap made on SUNCASA Castella Roti Tawa, spread chutney, and add the paneer filling.
- Roll and serve immediately.
Why We Love It:
- High in protein
- No-fuss cooking
- Great for lunchboxes or post-workout meals
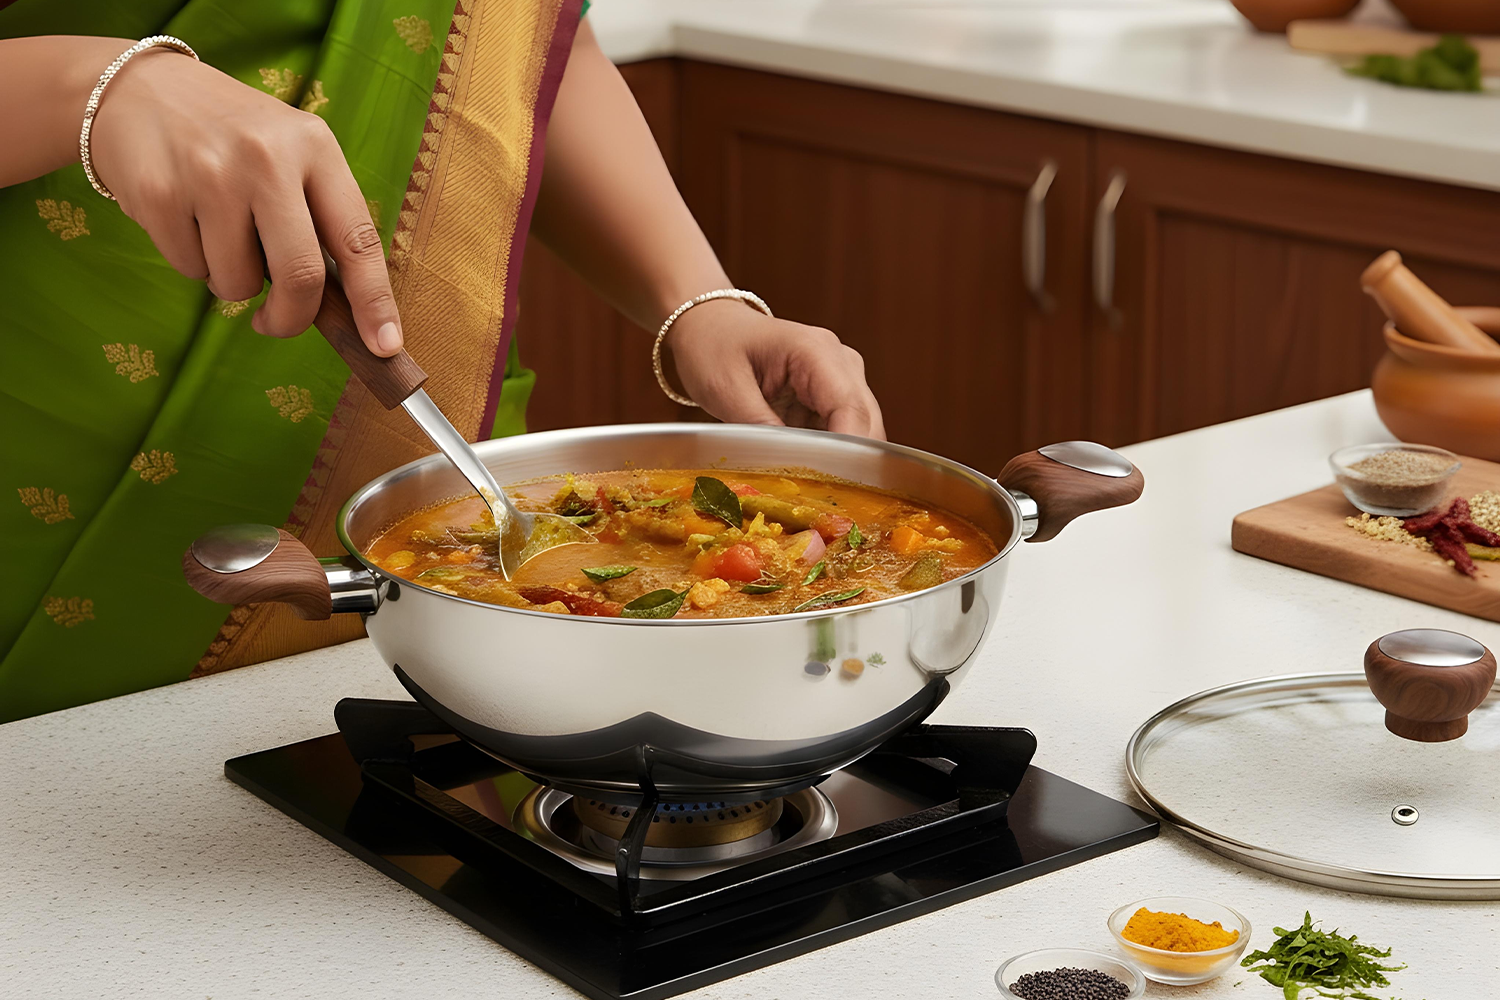
Easy Sambhar Recipe | One Pot Comfort Dish
Ingredients
- Wash ½ cup toor dal
- Slice 1 onion
- Chop 1 tomato, 1 onion, 4-5 french beans, 1 small carrot, 1 brinjal or few pieces of drumstick (optional), 1-2 green chillies
- ¼ tsp turmeric powder
- ½ tsp red chilli powder
- 1½ tbsp sambhar powder
- 1 tbsp tamarind paste (or soaked lemon-sized ball)
- ½ tsp mustard seeds
- A pinch of hing (asafoetida)
- Few curry leaves (kadipatta)
- 2 tsp oil or ghee
- Salt to taste
- Fresh coriander for garnish
- 4-5 cups water (adjust as needed)
How to Make It
- Add the washed toor dal with ¼ tsp turmeric powder, and 2 cups of water in a bowl. Bring to a boil, then lower the heat, cover, and let it simmer for 30-40 minutes or until the dal is completely soft and mushy. Mash it lightly with the back of a spoon and set aside.
- While the dal is cooking, heat oil or ghee in the Deep Kadhai or on medium heat. Add the mustard seeds and let them crackle. Then, add the hing, curry leaves, and slit green chillies.
- Add the sliced onions and cook until they turn soft and translucent. Now, add the chopped tomatoes and cook until they become soft.
- Add all the chopped vegetables (carrot, beans, brinjal/drumstick) to the kadhai. Stir in the red chilli powder and sambhar powder. Sauté for 2-3 minutes.
- Pour in about 1 cup of water, add salt, and mix well. Cover the kadhai and let the vegetables cook for 10-15 minutes on a medium-low flame, or until they are tender.
- Once the vegetables are cooked, pour in the cooked, mashed dal. Add another 1-2 cups of water to adjust the consistency to your liking. Stir everything together.
- Bring the sambhar to a gentle boil. Add the tamarind paste and let it simmer for another 5-7 minutes, allowing all the flavours to blend beautifully.
- Turn off the heat and garnish with fresh coriander. For extra aroma, you can add a spoon of ghee on top before serving.
Enjoy your delicious, home-cooked Sambhar made traditionally in our 100% toxin free stainless steel kadhai! It’s the perfect comfort food, full of rich flavours that develop wonderfully with slow cooking.

Shakshuka | One-Pot Egg Dish with Bold Flavour
Ingredients (Serves 2)
How to Make It
- Chop onion, garlic, capsicum, and tomatoes on your Suncasa Chopping Board
- Heat olive oil in the frypan. Add chopped onion and garlic. Sauté for 2–3 minutes until soft.
- Add capsicum and cook for another 2 minutes until slightly tender.
- Add tomatoes, cumin powder, paprika, salt, and pepper. Let the mixture simmer uncovered for 6–8 minutes until it thickens.
- With a spatula, make small gaps in the tomato mixture and break one egg into each gap gently.
- Cover the pan with a lid and cook on low heat for 5–7 minutes until the eggs are just set but still soft in the center.
- Garnish with fresh coriander (and feta or olives if using) and serve hot with crusty bread.
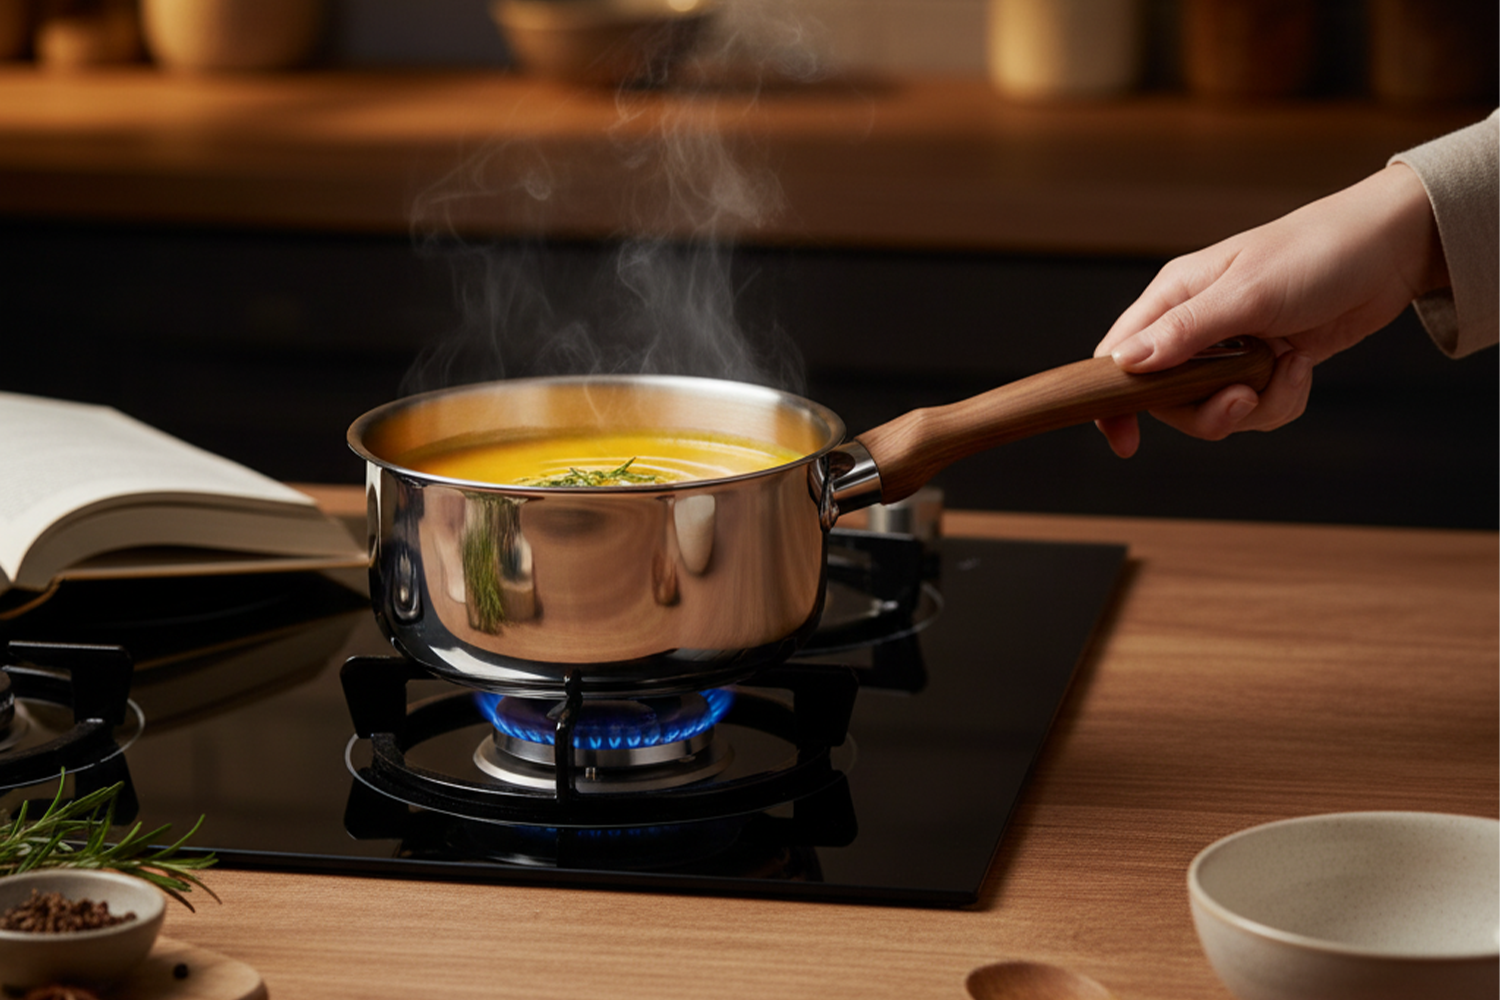
Pumpkin Soup Recipe | Easy to cook healthy soup
Ingredients
- 2 cups pumpkin (peeled and cubed)
- 1 chopped onion
- 2 garlic cloves (minced)
- 1 tsp olive oil or ghee
- 2 cups vegetable stock or water
- ½ cup coconut milk (optional for creaminess)
- Salt and pepper to taste
- Fresh herbs for garnish (like thyme or parsley)
Cooking Instructions
- Prep the veggies: On a clean SUNCASA chopping board, dice your pumpkin, onion, and garlic.
- Sauté the aromatics: Heat oil in the stainless steel sautepan for sautéing garlic and onions until golden.
- Add the pumpkin: Toss in the chopped pumpkin, season lightly with salt and pepper, and cook for 3-4 minutes.
- Simmer: Pour in SUNCASA Saucepan and let it simmer until the pumpkin becomes fork-tender.
- Blend & Serve: Use a blender to puree the mixture until smooth. Return to the pan, add coconut milk, adjust seasoning, and let it warm through. Serve the soup hot with herbs on top.
Make It Yours
- Add roasted carrots or sweet potatoes for a different flavor.
- Garnish with pumpkin seeds or croutons for crunch.
- Use fresh cream if you prefer a richer taste.
This isn't just easy to cook but also very healthy. Try it with the 304 food grade stainless steel cookware to have the ultimate cookware experience.
Frequently Asked Questions

Impact Forged Bottom
Impact Forged Bottom
An impact forged bottom is created by pressing stainless steel, aluminum, and magnetic steel layers together under high pressure and heat, forming a strong, solid base.
This design ensures even heat distribution, prevents warping, and provides long-lasting durability.
Aluminum speeds up cooking, while the magnetic steel makes it induction friendly, offering efficiency, reliability, and versatility in everyday cooking.
304 Stainless Steel
304 Stainless Steel
304 Stainless Steel is a premium, food-grade material known for its strength, durability, and rust resistance.
It does not react with food, ensuring safe and healthy cooking. 304 steel retains shine even after daily use, and is easy to clean and maintain, making it a trusted choice for long-lasting, hygienic cookware.
Three Layer Clad ( TLC) Metal
Three Layer Clad ( TLC) Metal
Triply cookware uses advanced Three Layer Clad Metal Technology, combining food-grade stainless steel inside, an aluminum core in the middle, and magnetic stainless steel outside.
This design ensures safe cooking, faster heating, even heat distribution, and durability while making the cookware induction friendly.
